
Best Fudgy Brownies with Chocolate Frosting

Rich, fudgy brownies finished with a homemade chocolate frosting. A simple classic that delivers glossy tops, crackly edges, and intense chocolate flavor every time.
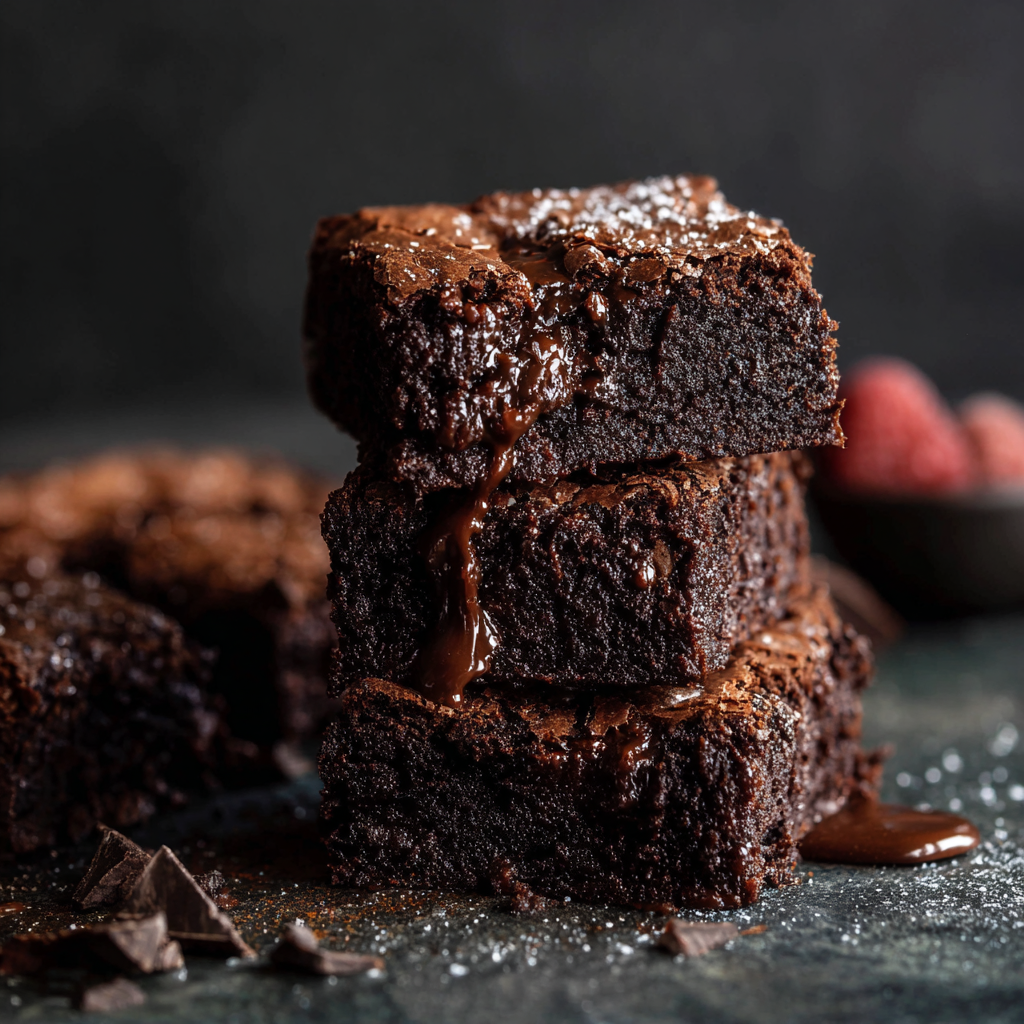
This brownie recipe has been my go-to when I want something reliably decadent and unfussy. I discovered this particular combination on a rainy afternoon when I needed a dessert that would please a mixed crowd of kids and grownups. The texture is what sold me: a deeply chocolatey center that stays moist and fudgy, contrasted by slightly crisp edges and a thin, glossy top. I first served these at a potluck and watched them disappear, with friends asking for the recipe the next day.
What makes these stand out is the frosting. It is simple, spreadable while the brownies are still warm, and it seals in the moisture while adding a shiny finish and extra chocolate intensity. I learned to trust the baking times and look for a few visual cues — such as the edges pulling away and the top looking dry — that mean the inside will stay fudgy without being underbaked. Over the years I have adapted tiny technique notes that make these consistent: gentle folding, melting the butter slowly, and frosting while warm for that classic crackle on top.
Why You'll Love This Recipe
- Ready in about 45 minutes from start to finish, including a quick 15 minute prep and 30 minute bake time, making it ideal for weeknight desserts or last-minute guests.
- Uses pantry staples that you likely already have: butter, sugar, eggs, cocoa powder, flour, and basic leavening agents.
- Delivers reliably fudgy centers with crisp edges when you follow the visual cues provided, so no special equipment or temperamental techniques required.
- The frosting is quick to prepare, spreads easily while brownies are warm, and forms a nostalgic glossy top that looks bakery-made.
- Easy to scale up or down for an 8-inch pan or a 9x13 pan; also adapts well to add-ins like chopped nuts or chocolate chips for variety.
- Comforting and crowd-pleasing: great for school bake sales, potlucks, or cozy family nights in.
Personally, these brownies became a holiday staple after my aunt raved about them at Thanksgiving. My children now request them for birthdays and school events. I appreciate how forgiving the method is, which has saved many imperfect baking days from becoming disasters. I always keep unsweetened cocoa and confectioners' sugar on hand for the frosting so I can pull these together at a moment's notice.
Ingredients
- Butter: Use 1/2 cup (1 stick) unsalted butter for the batter and 3 tablespoons for the frosting. Unsalted allows you to control seasoning; plug in salted if that is all you have and omit any added salt.
- Sugar: 1 cup granulated white sugar for structure and shine on the top. For a slightly deeper flavor, substitute half with light brown sugar but expect a bit more chew.
- Eggs: 2 large eggs at room temperature. Room-temperature eggs incorporate easier and help the batter emulsify, yielding better texture.
- Vanilla extract: 1 teaspoon in the batter and 1 teaspoon in the frosting. Pure vanilla gives the best, rounded flavor; imitation works in a pinch.
- Unsweetened cocoa powder: 1/3 cup for the batter and 3 tablespoons for the frosting. Use a quality Dutch-process or natural cocoa depending on preference; Dutch-process will be slightly mellower.
- All-purpose flour: 1/2 cup. Measure by spooning into the cup and leveling with a knife to avoid a dry, cakey result caused by over-packing.
- Salt and baking powder: 1/4 teaspoon salt and 1/4 teaspoon baking powder. The small amount of baking powder gives a gentle lift while keeping the dense, fudgy crumb.
- Confectioners' sugar and honey (for frosting): 1 cup confectioners' sugar and 1 tablespoon honey to smooth and sweeten the frosting while keeping it glossy.
Instructions
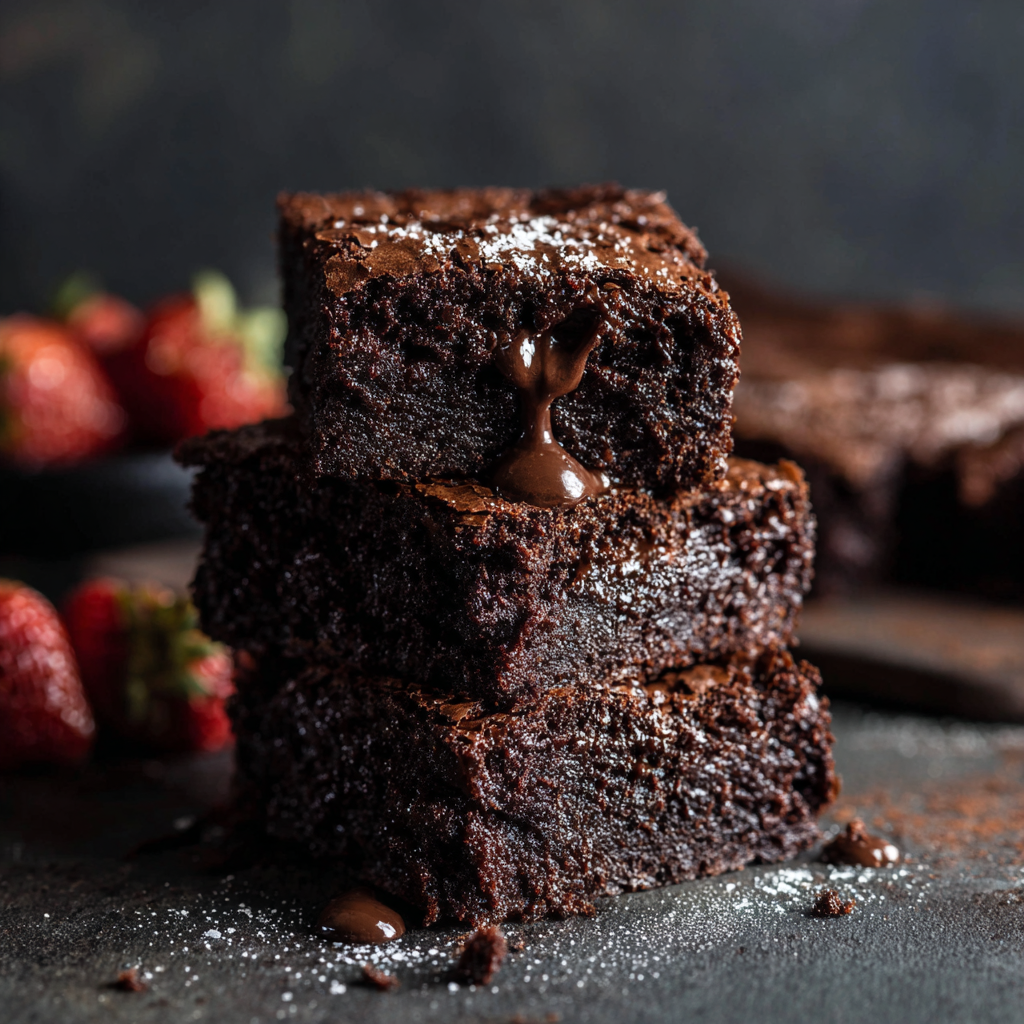
Preheat and prepare pan: Preheat the oven to 350 degrees F. Grease an 8-inch square pan thoroughly with butter or nonstick spray, then dust lightly with flour or line with parchment, leaving an overhang to lift the brownies out when cooled. Proper pan prep prevents sticking and ensures clean edges. Melt butter and combine wet ingredients: In a medium saucepan, melt 1/2 cup butter over low heat until just melted and remove from heat. Stir in 1 cup white sugar until glossy, then whisk in 2 large eggs one at a time until fully combined. Add 1 teaspoon vanilla extract. Allow the mixture to cool slightly so the eggs do not scramble, but mix while still warm for a silkier batter. Add dry ingredients: Beat in 1/3 cup unsweetened cocoa powder, 1/2 cup all-purpose flour, 1/4 teaspoon salt, and 1/4 teaspoon baking powder. Use gentle folds or slow stirring to combine without overworking the batter. Stop when no streaks of flour remain to keep the interior fudgy rather than cakey. Bake until set: Spread the batter evenly into the prepared pan. Bake at 350 degrees F for 25 to 30 minutes. Look for a dry top, and watch for the edges to pull away slightly from the sides — these visual cues mean the center will be set but still fudgy. A toothpick inserted near the center should come out with a few moist crumbs, not wet batter. Make the frosting and finish: While the brownies cool briefly, combine 3 tablespoons softened butter, 3 tablespoons unsweetened cocoa powder, 1 tablespoon honey, 1 teaspoon vanilla extract, and 1 cup confectioners' sugar in a bowl. Stir until smooth and spreadable. Frost the brownies while they are still warm so the frosting spreads easily and sets with a delicate crackle. Let cool completely to room temperature before slicing into 16 squares.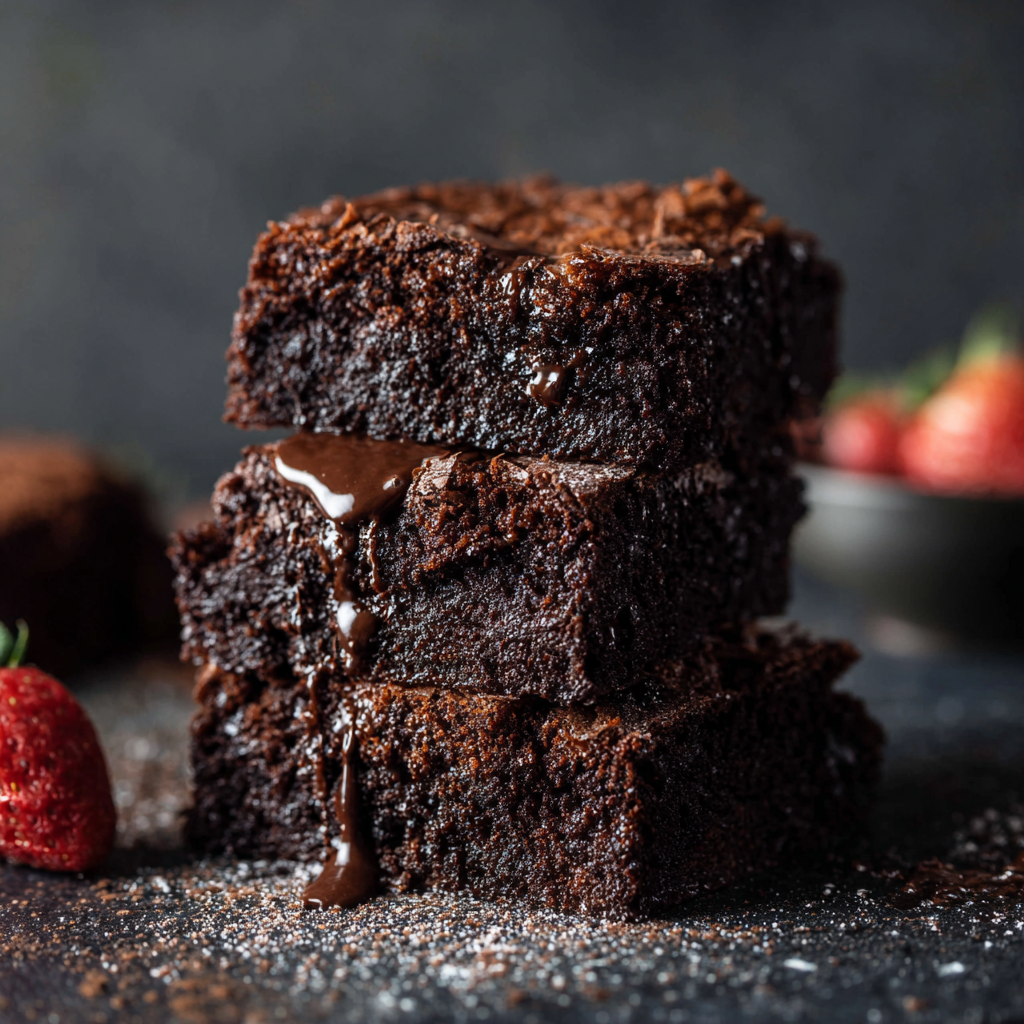
You Must Know
- This makes 16 standard brownies. Store at room temperature in an airtight container for up to 3 days, or refrigerate for up to a week for slightly firmer texture.
- Freezes well for up to 3 months. Wrap tightly in plastic and foil, and thaw overnight in the refrigerator before bringing to room temperature.
- Per serving nutrition approximates 184 calories, 9 grams fat, 25 grams carbohydrates, and 2 grams protein; treat as an occasional indulgence.
- Watch the bake time closely between 25 and 30 minutes depending on oven variance; baking a minute or two too long shifts the crumb from fudgy to cakey.
My favorite part of this recipe is how forgiving it is. Even on busy days I can pull the ingredients together and rely on the visual signs to deliver a treat that looks and tastes like it took longer. Family and friends often ask if I used a special chocolate; the answer is no. It is technique plus a good unsweetened cocoa that makes the difference. The warm frosting moment is always worth the wait — it gives the brownies a nostalgic bakery finish that brings back childhood memories for many guests.
Storage Tips
To keep the brownies at their best, let them cool completely before storing. For room temperature storage, place brownies in an airtight container with a sheet of parchment between layers and store up to 3 days. For longer life, refrigerate up to 7 days; bring to room temperature before serving for softer texture. For freezing, cut into squares, layer between parchment, wrap tightly in plastic wrap, and place in a freezer-safe bag for up to 3 months. Reheat individual squares briefly in a microwave for 10 to 15 seconds to recapture that just-baked warmth.
Ingredient Substitutions
If you prefer a slightly chewier bite, replace 1/4 cup of the all-purpose flour with 1/4 cup packed light brown sugar. For a richer flavor, swap 1/4 cup of the granulated sugar with dark brown sugar. Use melted dark chocolate in place of cocoa powder for an even more intense chocolate flavor, adjusting sweetness slightly. To make them nut-free, omit any optional additions; to add texture, stir in 1/2 cup chopped toasted walnuts or pecans. For dairy-free, substitute the butter with a plant-based spread measured 1:1 and use a vegan-friendly confectioners' sugar.
Serving Suggestions
Serve these brownies warm with a scoop of vanilla ice cream and a light dusting of cocoa or a drizzle of salted caramel for contrast. For a party platter, cut into small bite-sized squares and arrange with fresh berries to cut through the richness. They pair beautifully with coffee, a robust black tea, or a glass of cold milk. Garnish with flaky sea salt for an adult-oriented twist that highlights both sweetness and chocolate depth.
Cultural Background
The brownie is an American classic with origins in the late 19th and early 20th centuries. While recipes vary, the style here resembles the fudgy, glossy-top brownies popularized in mid-century cookbooks. Variations across regions include additions like nuts, chocolate chips, or frostings. Brownies became a staple at bake sales and family gatherings due to their portability and simple ingredients, evolving into countless regional riffs and gourmet interpretations.
Seasonal Adaptations
Adapt these for seasonal celebrations by adding orange zest and a tablespoon of Grand Marnier in winter, or swirling in a raspberry jam before baking for a summer twist. For autumn, stir in a pinch of cinnamon and a tablespoon of molasses to the batter for warm spice notes. Holiday versions can be topped with peppermint buttercream or sprinkled with crushed candy canes for festive flair. The base remains reliable so seasonal additions shine without overwhelming the core chocolate character.
Meal Prep Tips
For make-ahead planning, bake and frost the brownies up to two days in advance and store in an airtight container at room temperature. For busy weeks, freeze unfrosted squares and prepare the frosting fresh on the day you plan to serve them. To portion for lunches, wrap individual squares in parchment and place in reusable containers; they thaw quickly and retain freshness. Label freezer packages with the date and planned serving suggestions so you can rotate treats easily.
These brownies are a timeless dessert to share, adapt, and enjoy. They reward simple technique and quality ingredients, and I hope they become a favorite for your family as they are for mine. Let them cool, slice carefully, and savor every fudgy bite.
Pro Tips
Measure flour by spooning into the cup and leveling with a knife to avoid overpacking and a cakey texture.
Frost the brownies while still warm for a glossy, slightly crackled top that sets as they cool.
Use room-temperature eggs to help the batter emulsify and produce a smooth, fudgy crumb.
Watch for the edges to pull away from the pan and a dry top; a toothpick with moist crumbs indicates fudgy doneness.
This nourishing best fudgy brownies with chocolate frosting recipe is sure to be a staple in your kitchen. Enjoy every moist, high protein slice — it is perfect for breakfast or as a wholesome snack any time.
FAQs about Recipes
How long should I wait to cut the brownies after frosting?
Let cooled brownies rest at room temperature for at least 30 minutes after frosting to allow the topping to set before slicing.
Can I freeze the brownies?
Yes, these can be frozen. Wrap squares tightly in plastic and foil and freeze up to 3 months. Thaw overnight in the refrigerator.
Tags
Best Fudgy Brownies with Chocolate Frosting
This Best Fudgy Brownies with Chocolate Frosting recipe makes perfectly juicy, tender, and flavorful steak every time! Serve with potatoes and a side salad for an unforgettable dinner in under 30 minutes.
Ingredients
Batter
Frosting
Instructions
Preheat and prepare pan
Preheat the oven to 350 degrees F. Grease an 8-inch square pan and lightly dust with flour or line with parchment leaving an overhang for easy removal.
Melt butter and combine wet ingredients
Melt 1/2 cup butter in a saucepan over low heat and remove from heat. Stir in 1 cup sugar, then whisk in 2 large room-temperature eggs one at a time and 1 teaspoon vanilla until smooth and slightly glossy.
Incorporate dry ingredients
Beat in 1/3 cup unsweetened cocoa, 1/2 cup all-purpose flour, 1/4 teaspoon salt, and 1/4 teaspoon baking powder. Fold gently until no streaks of flour remain, avoiding overmixing to preserve fudginess.
Bake until set
Spread batter evenly into the prepared pan and bake at 350 degrees F for 25 to 30 minutes. The top should look dry and the edges should pull away slightly. A toothpick should have moist crumbs but not wet batter.
Prepare frosting and finish
Combine 3 tablespoons softened butter, 3 tablespoons cocoa, 1 tablespoon honey, 1 teaspoon vanilla, and 1 cup confectioners' sugar. Stir until smooth and spread over the brownies while they are still warm. Allow to cool before slicing into 16 squares.
Last Step: Please leave a rating and comment letting us know how you liked this recipe! This helps our business to thrive and continue providing free, high-quality recipes for you.
Nutrition
Did You Make This?
Leave a comment & rating below or tag
@kitchenfunwithmy3sons on social media!
Categories:
You might also like...
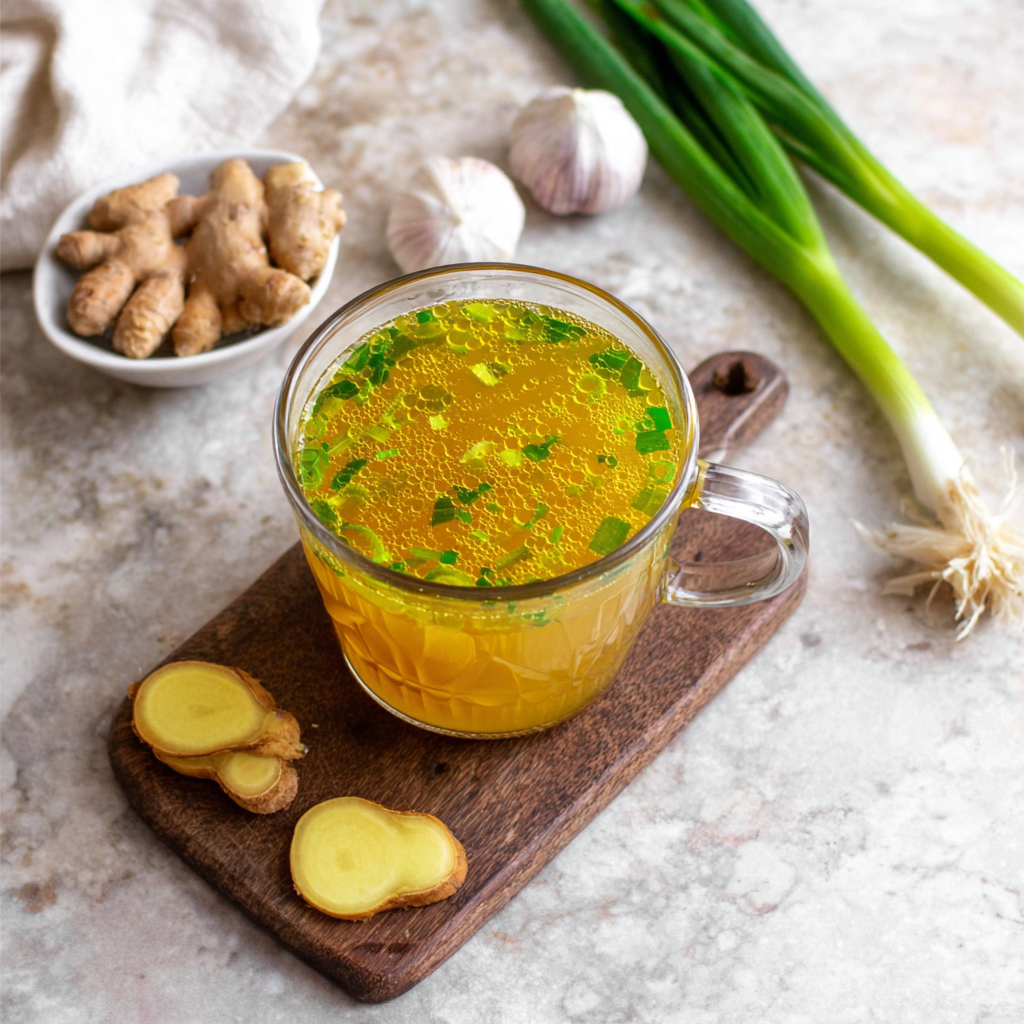
10 Minute Immune Boosting Broth
A fast, nourishing broth packed with garlic, ginger, miso, and turmeric to support immunity. Ready in 10 minutes and naturally dairy free, gluten free, and vegan.
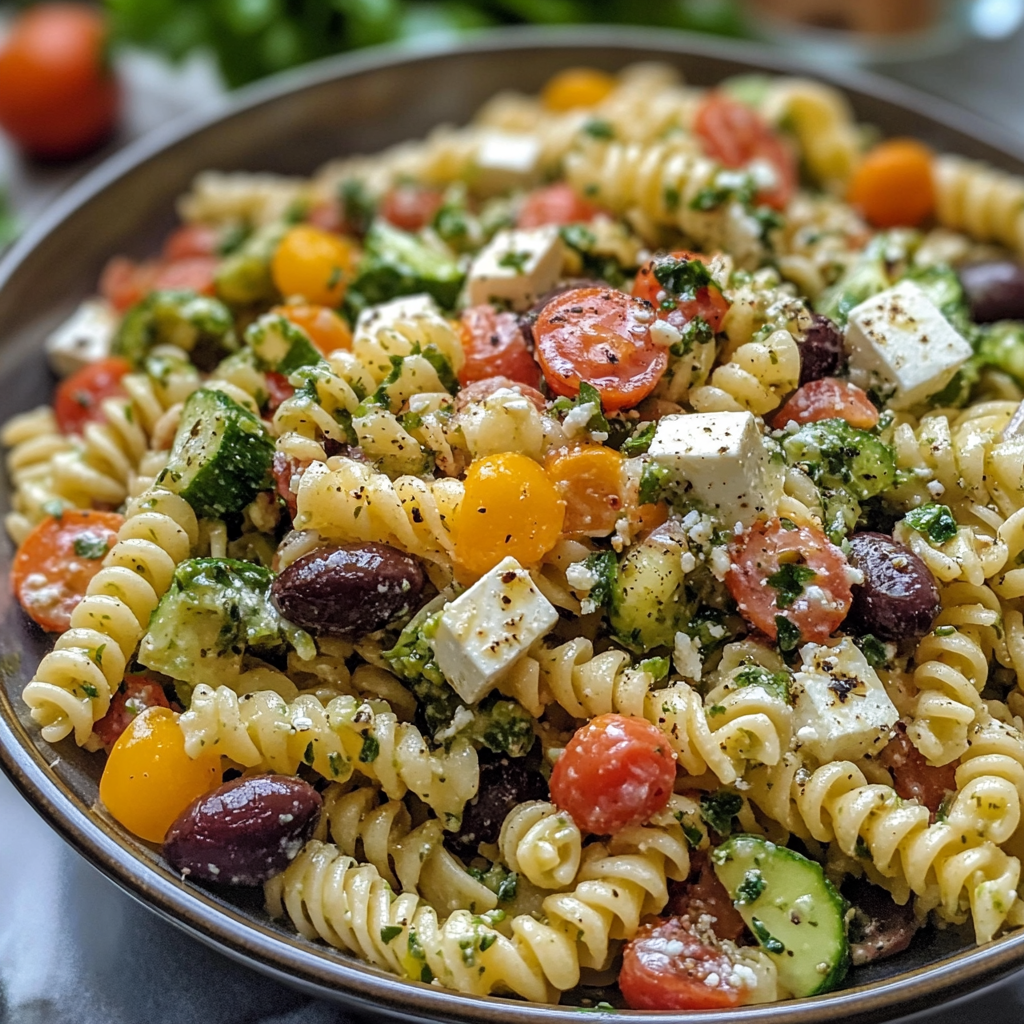
20-Minute Greek Pasta Salad
A bright, quick Greek-style pasta salad loaded with crunchy vegetables, Kalamata olives, tangy feta, and a creamy tzatziki dressing—ready in 20 minutes and perfect for summer gatherings.
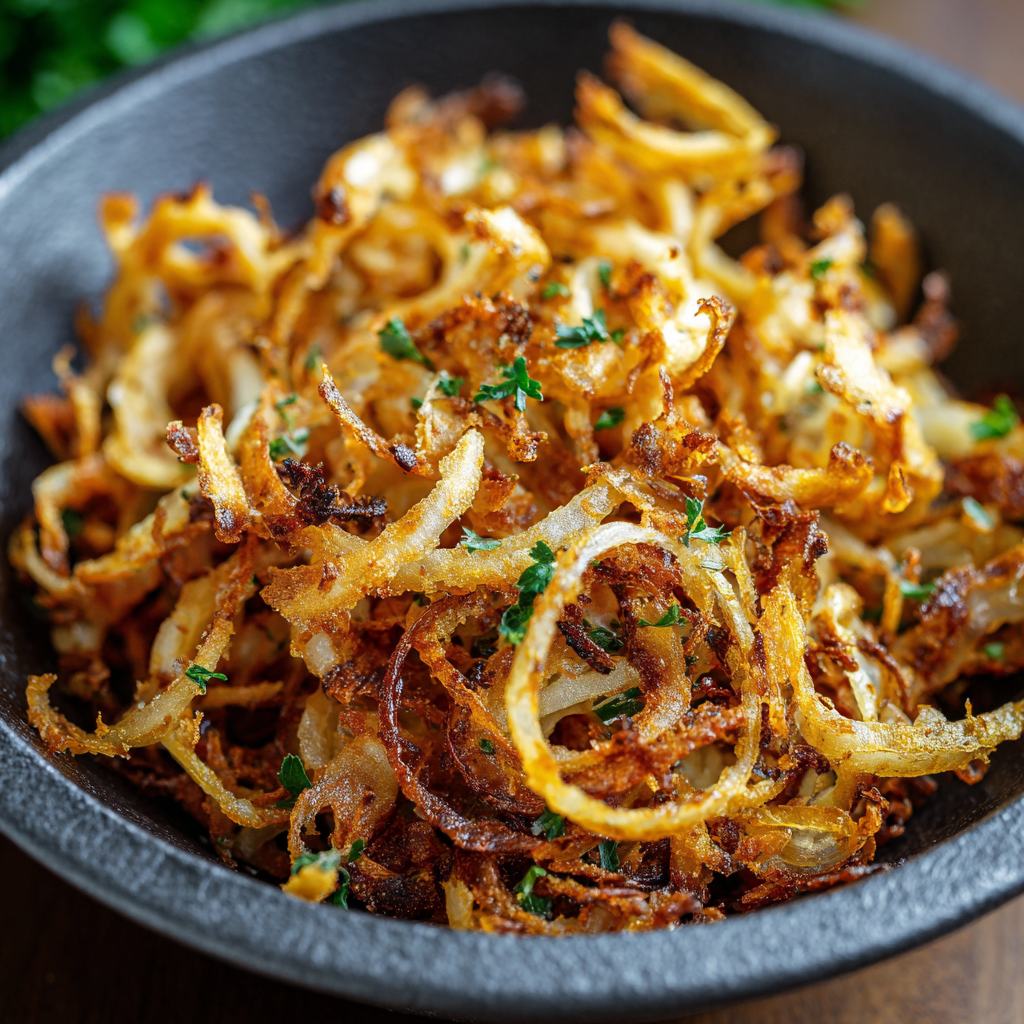
Air Fried Crispy Onion
Make perfectly caramelized crispy onions in an air fryer with just a touch of oil for a crunchy, savory topping that elevates any dish.
Did You Make This?
Leave a comment & rating below or tag @kitchenfunwithmysons on social media!
Rate This Recipe
Share This Recipe
Enjoyed this recipe? Share it with friends and family, and don't forget to leave a review!
Comments (1)
This recipe looks amazing! Can't wait to try it.
Comments are stored locally in your browser. Server comments are displayed alongside your local comments.
Hi, I'm Rachel!
What's Popular
Get My 30-Minute Meals email series!
Quick and easy dinner ideas delivered to your inbox.