>>
30-MINUTE MEALS! Get the email series now →


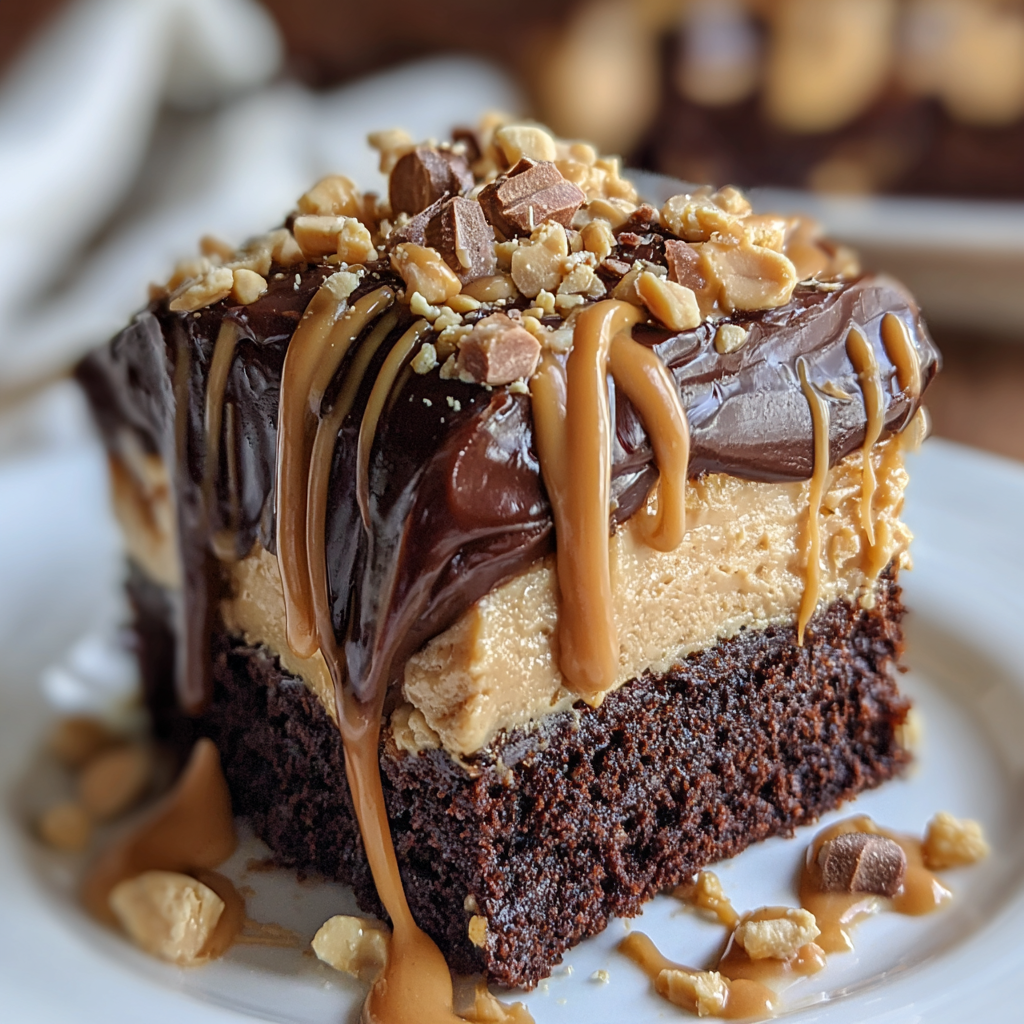
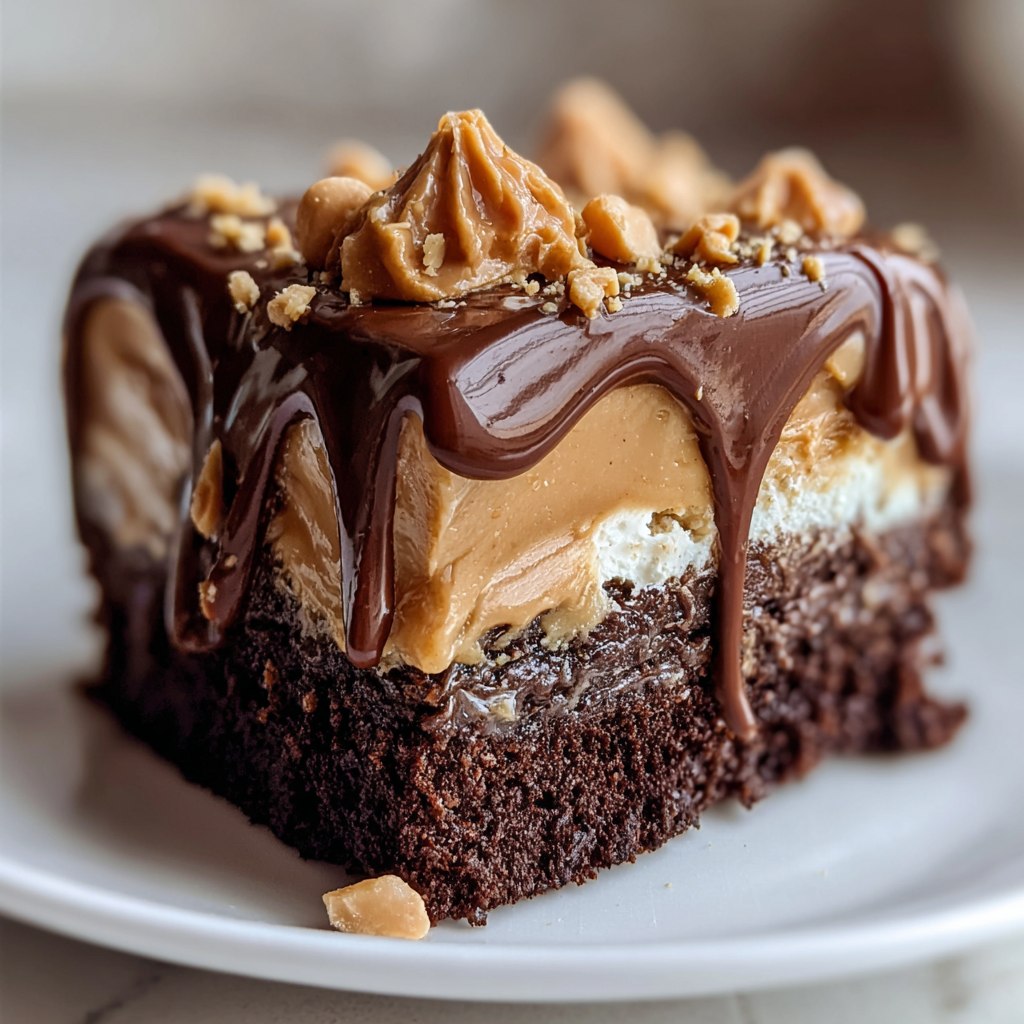
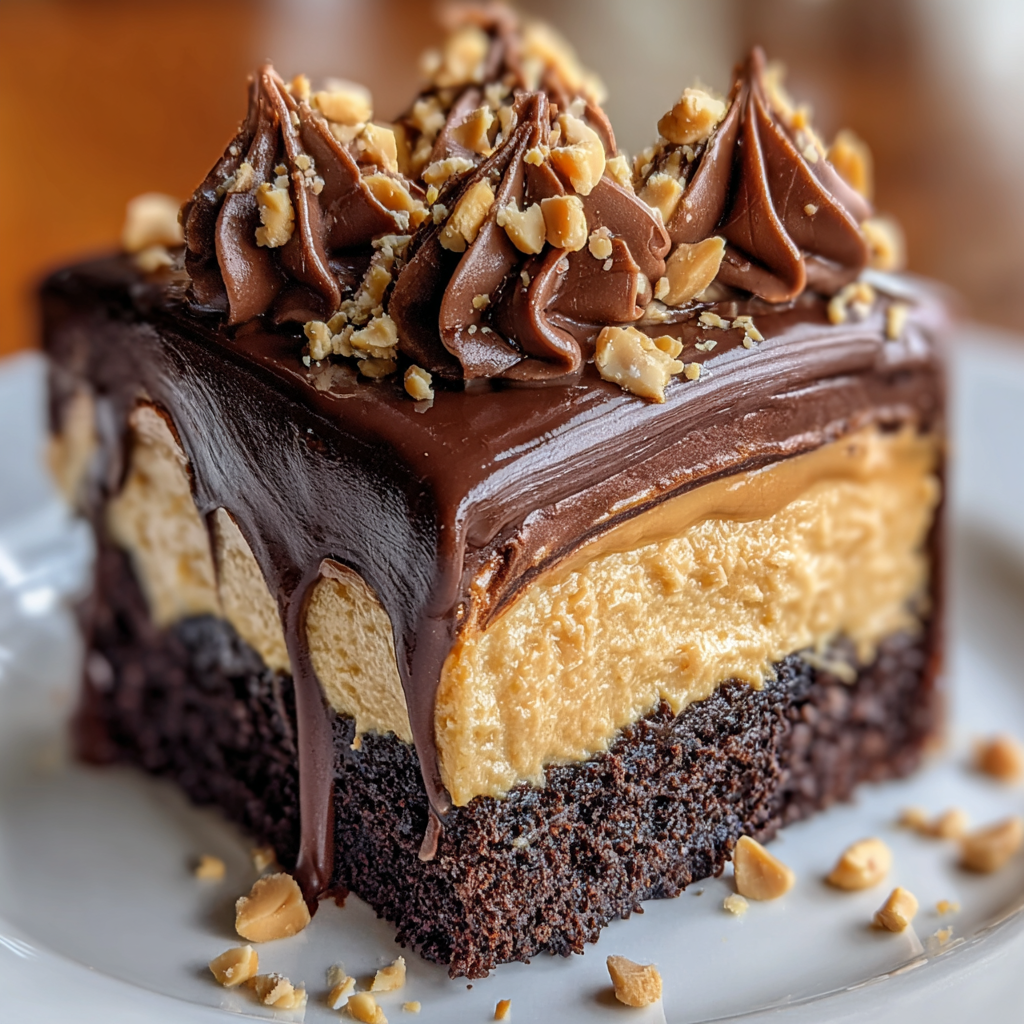
A moist chocolate cake with creamy peanut butter filling soaked into pockets, topped with whipped peanut butter frosting, peanut butter cups and a fudge drizzle. Crowd-pleasing and easy to make ahead.
This Chocolate Peanut Butter Poke Cake has been my go-to celebration dessert for casual get-togethers and sleepy Sunday afternoons. I first stumbled on this combination years ago when I wanted something richer than a boxed cake but faster than a layered torte. The idea of soaking a warm cake with a sweet, silky peanut butter and condensed milk mixture sounded daring and it delivered. The result is a cake that is unexpectedly tender, almost pudding like where the filling settles into the holes, yet still retains an airy crumb between pockets of flavor. Every time I bring this to a gathering, people ask for the recipe and then text me photos of their plates later that night.
What makes this version special is the balance between deep, cocoa forward cake and the clean, nutty sweetness of the peanut butter filling. I like to use a high quality devil s food mix or my own from-scratch chocolate batter when I have the time. The topping is light a whipped topping blended with a touch of peanut butter for body so the cake never feels cloying. When decorated with chopped peanut butter cups and a ribbon of hot fudge the result is both nostalgic and a little bit decadent. It is a dessert that travels well, keeps beautifully in the refrigerator and always disappears faster than I expect.
I first tested this on a rainy spring afternoon when friends dropped by unexpectedly. The kitchen smelled like warm chocolate and roasted peanuts by the time it cooled. My partner declared it a keeper and I have since brought it to potlucks, birthdays and quick coffee dates. Every time someone asks for more, which is often, I remember that stormy day and smile.
My favorite thing about this cake is how the texture changes after chilling. The pockets of peanut butter become almost caramel like and the cake crumb turns plush. I have a clear memory of bringing this to a summer barbecue and watching it disappear before I could get a photo. After that I always make extra and wrap the leftovers for friends.
Store the cake covered with plastic wrap or in an airtight container in the refrigerator. For best texture, consume within four days. If you must freeze, cut into individual slices, wrap each piece tightly in plastic wrap and then foil. Place in a freezer safe bag and freeze up to three months. To defrost, transfer to the refrigerator overnight and bring to cool room temperature before serving. Avoid leaving at room temperature more than two hours because of the dairy content.
To make a dairy free version use a plant based whipped topping and coconut condensed milk alternatives. For a gluten free option, bake a gluten free chocolate cake in the same 9x13 inch pan and proceed with the remainder of the instructions. Swap peanut butter for almond butter if you prefer tree nuts, but expect a slightly different sweetness and mouthfeel. If you prefer less sweetness, use half the can of condensed milk and add a splash of whole milk to reach pouring consistency.
Serve slices chilled with a dusting of cocoa powder and a few halved peanut butter cups on top. It pairs beautifully with black coffee or a milk stout for adults. For a party presentation, cut the cake into small squares and plate with fresh berries and mint leaves to add color and cut the richness. A scoop of vanilla ice cream alongside a warm drizzle of fudge makes for an irresistible plate.
Poke style cakes became popular in mid century American home baking as an easy way to introduce custard like pockets into sheet cakes. The technique is simple yet transformative. Combining chocolate and peanut butter is a classic American flavor pairing that rose to prominence with candy innovations in the twentieth century. This dessert blends nostalgic candy bar profiles with approachable home baking techniques.
In colder months add a pinch of cinnamon or nutmeg to the whipped topping for warmth. For summer cookouts, top with chopped salted roasted peanuts and a swirl of caramel instead of fudge. At holiday times fold miniature chocolate chips into the whipped topping or scatter festive candy for a seasonal twist. The cake adapts well to citrus accents too a teaspoon of orange zest in the filling brightens the overall flavor.
Assemble the cake up to four hours before serving for ideal flavor melding. If preparing in advance for the week, store individual slices in shallow airtight containers for quick grab and go desserts. Use disposable 9x13 pans when transporting to events to simplify cleanup. Label the container with the date and ingredients if you are sharing with guests who may have allergies.
There is something joyful about a dessert that feels both familiar and elevated. This cake has been a highlight at many of my gatherings and I hope it becomes part of your rotation too. Try the variations, make it your own and do not be surprised when everyone asks for the recipe.
Poke holes while the cake is still hot so the filling sinks in more easily and evenly.
Warm the peanut butter and condensed milk slightly if it is too thick to pour so it seeps into the holes.
Chill the assembled cake for at least four hours to let the filling set; this improves texture dramatically.
Use an offset spatula to spread the topping gently without disturbing the soaked surface.
This nourishing chocolate peanut butter poke cake recipe is sure to be a staple in your kitchen. Enjoy every moist, high protein slice — it is perfect for breakfast or as a wholesome snack any time.
Yes. The cake can be baked from scratch or made from a boxed devil s food mix. Either works; boxed mix shortens hands-on time.
Refrigerate covered for up to four days or freeze individual slices for up to three months. Thaw in refrigerator overnight.
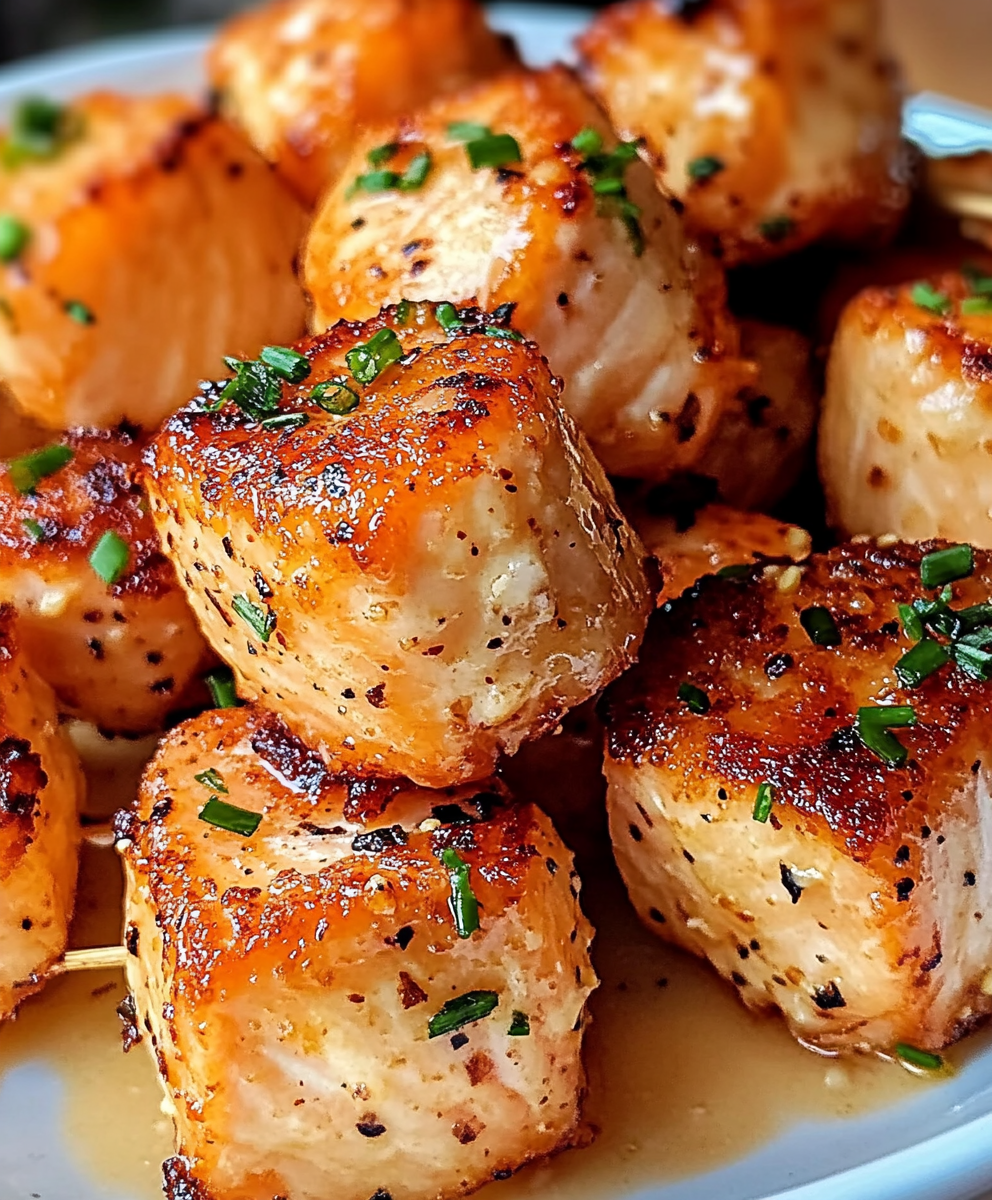
This Chocolate Peanut Butter Poke Cake recipe makes perfectly juicy, tender, and flavorful steak every time! Serve with potatoes and a side salad for an unforgettable dinner in under 30 minutes.
Preheat oven and prepare the cake batter according to package or recipe. Pour into a greased 9x13 inch pan and bake until a toothpick comes out with a few moist crumbs, about 25 to 30 minutes. Let rest 5 minutes.
While cake is still hot, use the end of a wooden spoon to poke holes about 1 inch apart across the surface. Make sure holes reach most of the way to the bottom but do not break through.
Whisk together the 14 ounce can of sweetened condensed milk and 1/2 cup peanut butter until smooth. Warm briefly if too thick to pour.
Pour the peanut butter mixture slowly over the cake, concentrating over the holes and allowing the filling to sink in. Let the pan cool to room temperature.
Stir the thawed whipped topping with the remaining 1/4 cup peanut butter until smooth and spreadable.
Spread the topping evenly, garnish with chopped peanut butter cups, drizzle fudge sauce and extra peanut butter. Refrigerate at least four hours before serving.
Last Step: Please leave a rating and comment letting us know how you liked this recipe! This helps our business to thrive and continue providing free, high-quality recipes for you.
Leave a comment & rating below or tag
@kitchenfunwithmy3sons on social media!
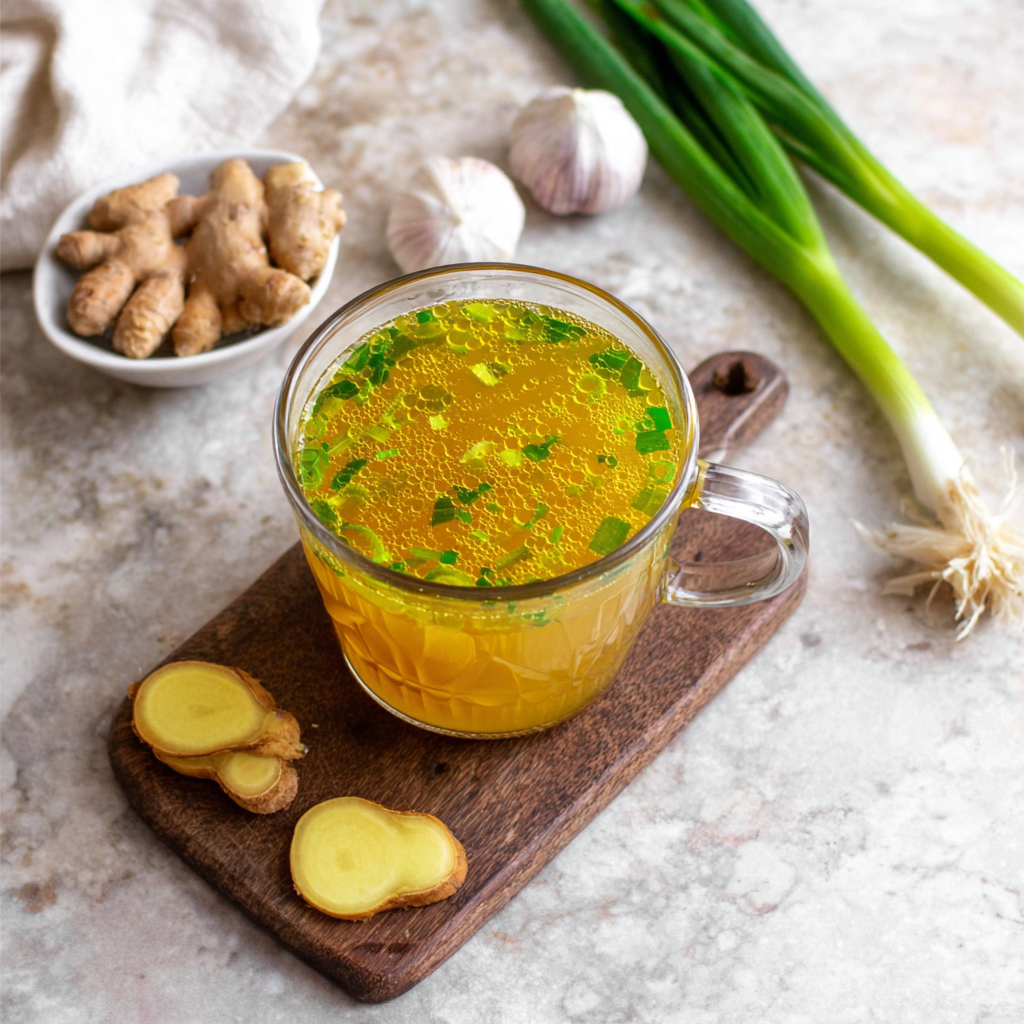
A fast, nourishing broth packed with garlic, ginger, miso, and turmeric to support immunity. Ready in 10 minutes and naturally dairy free, gluten free, and vegan.
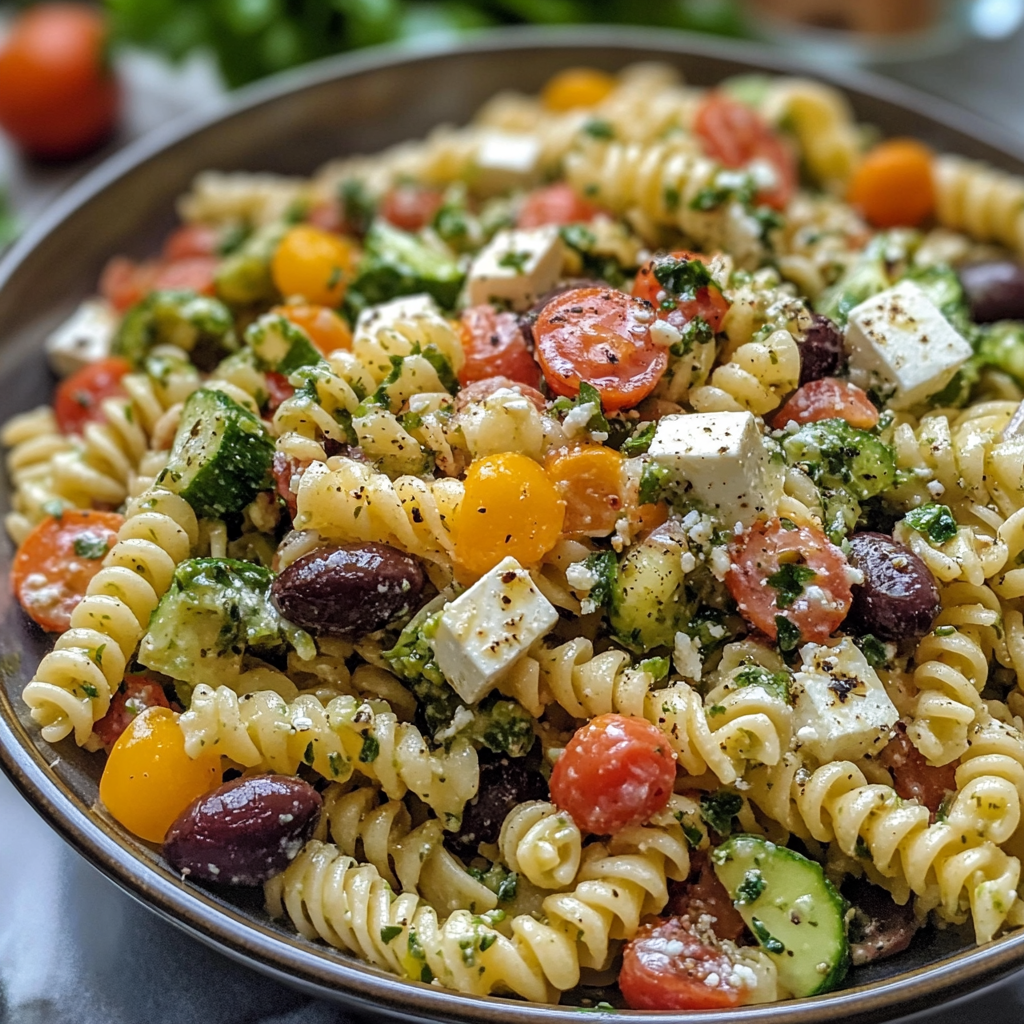
A bright, quick Greek-style pasta salad loaded with crunchy vegetables, Kalamata olives, tangy feta, and a creamy tzatziki dressing—ready in 20 minutes and perfect for summer gatherings.
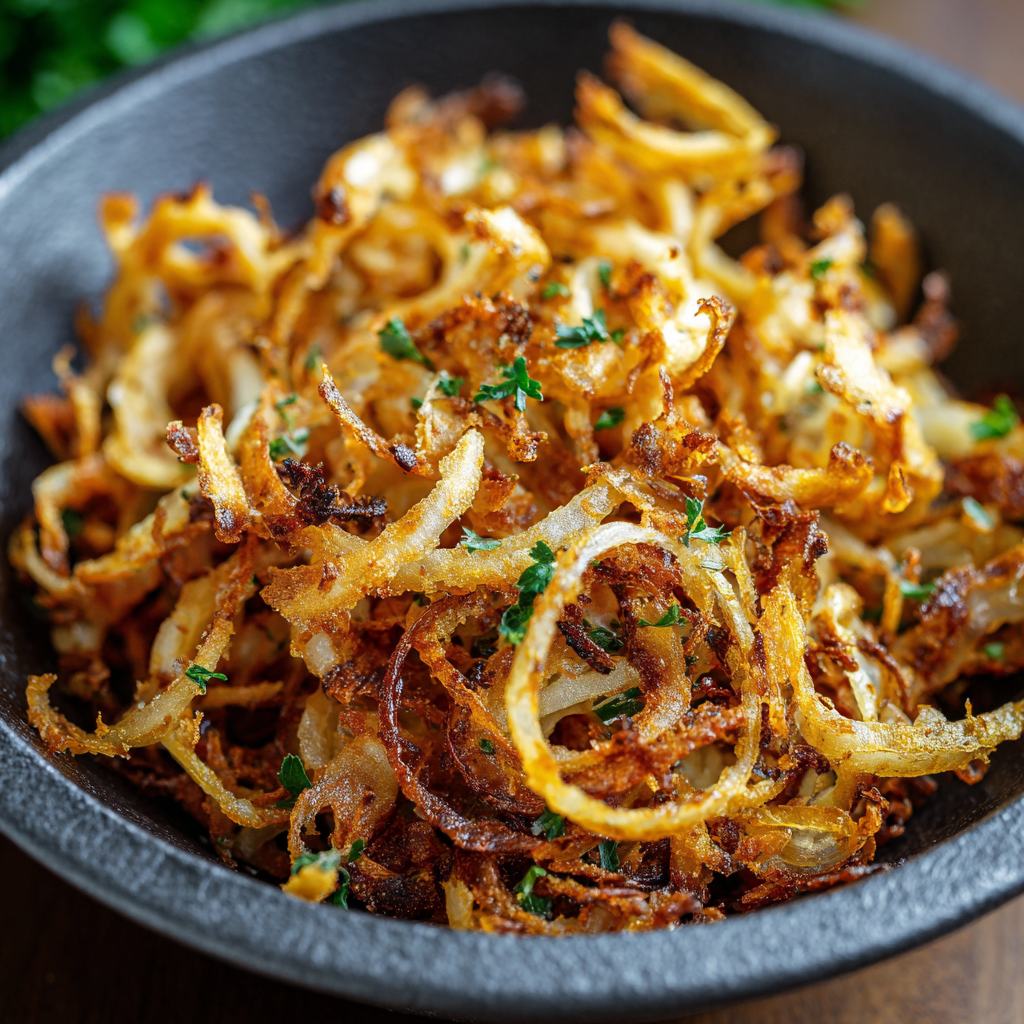
Make perfectly caramelized crispy onions in an air fryer with just a touch of oil for a crunchy, savory topping that elevates any dish.
Leave a comment & rating below or tag @kitchenfunwithmysons on social media!
Enjoyed this recipe? Share it with friends and family, and don't forget to leave a review!
This recipe looks amazing! Can't wait to try it.
Comments are stored locally in your browser. Server comments are displayed alongside your local comments.
Quick and easy dinner ideas delivered to your inbox.