
Korean Beef Bowls

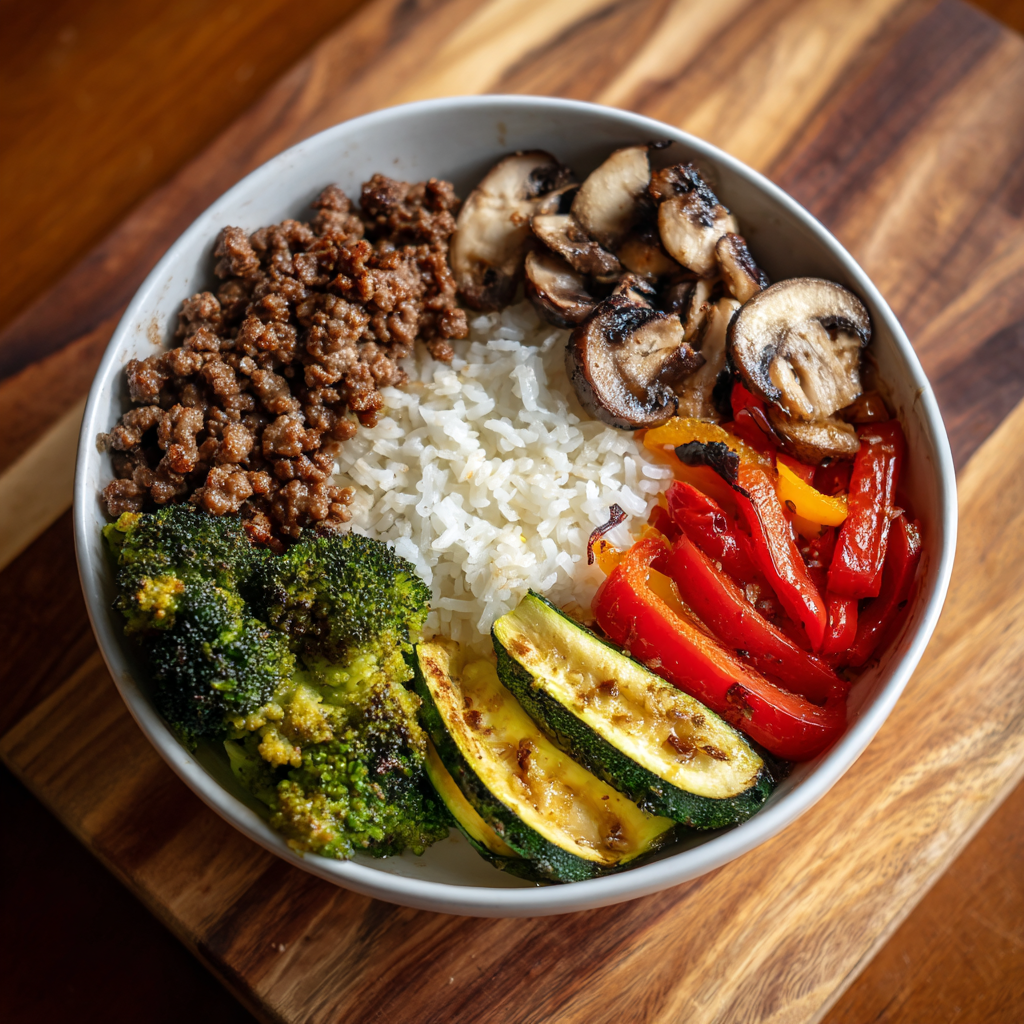
Savory-sweet Korean-style ground beef served over steamed rice with colorful vegetables — a quick, family-friendly dinner ready in 30 minutes.
This bowl of Korean-style ground beef over steamed rice has been my weekday dinner lifesaver for years. I first put this combination together on a rainy weeknight when I had a pound of ground beef and a drawer full of frozen vegetables. The sweet-salty glaze that coats the meat married beautifully with fluffy rice and crisp-tender veggies, and within a few bites everyone at the table declared it a keeper. It’s the kind of dish that balances comfort with bright umami flavors — slightly caramelized brown sugar, warm sesame oil, a whisper of ginger, and the savory backbone of soy sauce.
I love this for its speed and versatility. From the moment the pan heats to the moment bowls hit the table is just about half an hour; it’s the perfect answer to a busy evening when you want something that tastes thoughtful without complicated steps. The texture contrast — tender crumbled beef, chewy rice, and crunchy vegetables — is what keeps us going back for seconds. Over the years I’ve tweaked the seasoning ratios and added small details like a cornstarch slurry to give the sauce a glossy cling, and the result is reliably satisfying every time.
Why You'll Love This Recipe
- Ready in under 30 minutes from start to finish, making it ideal for busy weeknights and last-minute meals.
- Uses pantry staples and easily sourced produce so you can make it without a special grocery run.
- Flexible: swap the vegetables for whatever you have on hand — broccoli, carrots, peppers, or mushrooms all work.
- Make-ahead friendly: the beef freezes well or can be refrigerated for easy reheating for lunches.
- Family-friendly flavors with a balanced sweet-salty profile that appeals to kids and adults alike.
- High in protein and customizable for lower-sodium or gluten-free diets by adjusting soy sauce.
I can’t count how many times this dish rescued a hectic evening. My family often asks for the extra green onions and sesame seeds — small touches that make the bowls feel special. Once I served this for friends who requested the recipe the next day; it’s one of those simple dishes that people remember.
Ingredients
- Lean ground beef (1 1/4 pounds): I use 90% lean for a good balance of flavor and lower fat; choose 80/20 if you want a slightly richer mouthfeel. Freshness matters—look for bright red color and avoid any meat with excess liquid in the package.
- Garlic (2 teaspoons, minced): Use fresh garlic for the best aroma. Jarred minced garlic works in a pinch but won’t bloom the same way when sautéed.
- Fresh ginger (1/2 teaspoon, minced): Adds brightness and a peppery lift; peel with the edge of a spoon and finely mince for even distribution.
- Sesame oil (1 tablespoon): Toasted sesame oil adds a nutty finish — a little goes a long way so add it to the sauce rather than cooking in it.
- Brown sugar (1/4 cup): Light or dark both work; dark will deepen the caramel notes. This sweet element balances the soy sauce and creates that familiar bulgogi-like flavor.
- Low-sodium soy sauce (1/4 cup): Reduces saltiness but maintains umami; for gluten-free use tamari or a GF soy substitute.
- Cornstarch (1 teaspoon): Mixed with a tablespoon of cold water to make a slurry — this thickens the sauce so it clings to the meat instead of pooling in the bowl.
- Green onions (1/4 cup, sliced): Adds fresh oniony crunch and color; reserve some for garnish.
- Sesame seeds (1 tablespoon): Toast them briefly in a dry pan for extra aroma before sprinkling.
- Steamed rice (3 cups cooked): Short-grain or medium-grain white rice works best for stickiness, but jasmine or brown rice are fine alternatives.
- Vegetables (3 cups): A mix of steamed or sautéed broccoli, carrots, asparagus, mushrooms or bell peppers adds color and texture — choose a combination you and your family enjoy.
Instructions
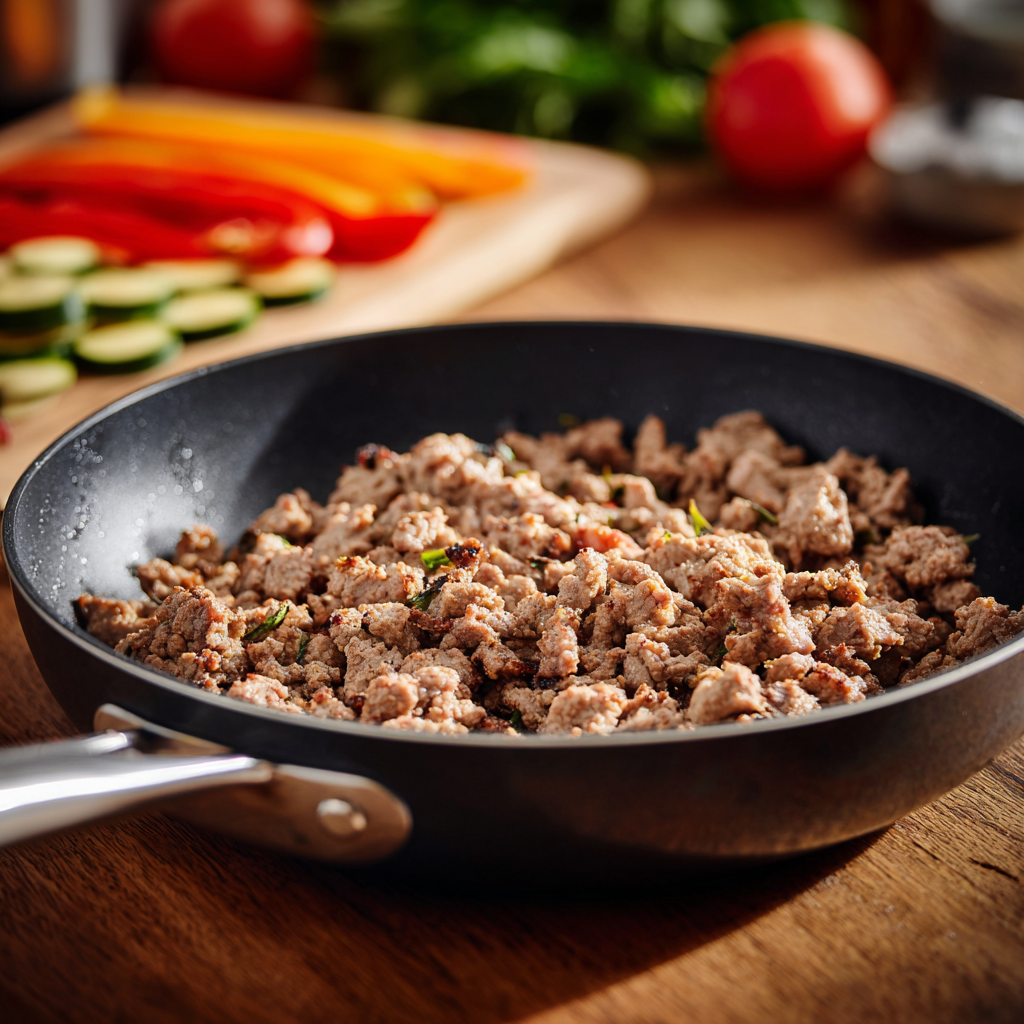
Heat and cook the beef: Place a large skillet over medium-high heat and add the ground beef. Break it up immediately with a spatula so it browns evenly. Cook for about 4–6 minutes, stirring occasionally, until the beef is fully cooked through and starting to caramelize in spots. Drain excess fat if you used fattier beef; with 90% lean this is usually minimal. Add aromatics: Reduce the heat slightly and stir in the minced garlic and ginger. Cook for about 1 minute, until fragrant — you should smell a warm, toasty aroma but avoid browning the garlic too deeply or it will turn bitter. Make the sauce: In a small bowl whisk together the sesame oil, brown sugar and low-sodium soy sauce until the sugar begins to dissolve. Pour this mixture over the cooked beef and bring the pan to a simmer. Let it bubble gently for 3–4 minutes so the flavors meld and the sugar starts to caramelize. Thicken the sauce: Combine 1 teaspoon cornstarch with 1 tablespoon cold water to make a slurry and stir it into the beef mixture. Cook for about 1 minute until the sauce thickens and becomes glossy. The sauce should cling to the meat; if it becomes too thick, stir in a splash of water. Finish and garnish: Remove from heat and stir in the sliced green onions and toasted sesame seeds. Taste and adjust seasoning — add a touch more soy if you want salt, or a squeeze of lime for brightness. Assemble the bowls: Divide the steamed rice and vegetables among four bowls. Spoon the glossy beef mixture over the rice, garnish with extra green onions and sesame seeds, and serve immediately while warm.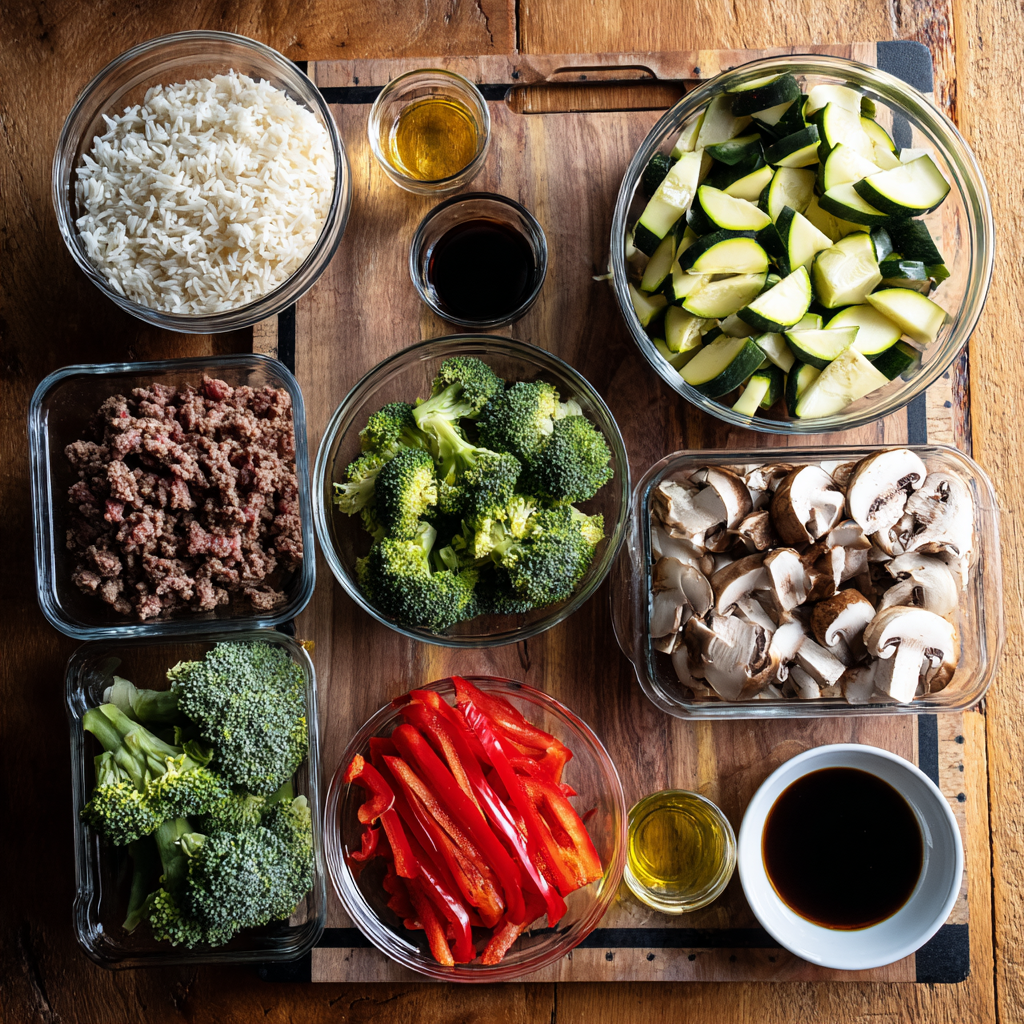
You Must Know
- This yields four hearty servings — plan on about 3/4 to 1 cup cooked rice per bowl and 6 ounces of cooked beef per person.
- Store leftovers in an airtight container in the refrigerator for up to 3 days; the beef reheats well in a skillet or microwave.
- To freeze, cool completely and freeze in portioned containers for up to 3 months; thaw overnight in the refrigerator before reheating.
- The dish is high in protein and moderate in carbohydrates; adjust rice portions or swap for cauliflower rice to reduce carbs.
- If using regular soy sauce this recipe contains gluten; choose tamari to keep it gluten-free.
My favorite thing about these bowls is how adaptable they are — every time I switch up the vegetables or add a fried egg on top, it feels like a new meal. Once, when I was short on time, I used leftover roasted bell peppers and frozen peas; the family never guessed it wasn’t freshly prepped and asked for seconds. It’s a reliable, forgiving recipe that rewards small tweaks.
Storage Tips
Let the beef cool to room temperature before storing to avoid condensation. For short-term storage, place in an airtight container and refrigerate for up to 3 days. For longer storage, portion into meal-sized containers and freeze up to 3 months. Reheat in a skillet over medium heat with a tablespoon of water or broth to revive the sauce and prevent drying; if microwaving, cover loosely to trap steam and reheat in 30-second bursts until hot. Rice can be stored separately to keep texture intact.
Ingredient Substitutions
If you prefer a leaner protein, swap the ground beef for ground turkey or chicken — add a teaspoon of oil when cooking to compensate for lower fat. For vegetarian options, use crumbled firm tofu or cooked lentils and increase the sesame oil and soy sauce slightly for depth. To make it gluten-free, replace soy sauce with tamari; to cut sugar, reduce the brown sugar to 2 tablespoons and add a splash of mirin or a pinch of stevia if needed. For a smokier note, add 1/2 teaspoon gochujang or a dash of smoked paprika.
Serving Suggestions
Serve these bowls with simple garnishes: extra sliced green onions, a sprinkle of toasted sesame seeds, and a few chili flakes for heat. A soft-boiled or fried egg makes the bowls heartier and adds creaminess when the yolk breaks. For sides, quick cucumber kimchi, pickled carrots, or a crisp green salad with rice vinegar dressing complement the savory beef. Present the bowls family-style so everyone can customize toppings.
Cultural Background
Bowls of savory beef over rice draw inspiration from Korean home-cooking flavors, particularly the sweet-savory notes found in bulgogi and other marinated beef dishes. While this version simplifies traditional techniques by using ground meat and a streamlined sauce, the core elements — soy, sesame, garlic, ginger, and sugar — are rooted in Korean flavor profiles. Similar quick dishes have become popular worldwide as approachable ways to bring those vibrant tastes to everyday meals.
Seasonal Adaptations
Change the vegetable mix with the seasons: in spring use asparagus and sugar snap peas; in summer toss in blistered cherry tomatoes and bell peppers; in autumn add roasted mushrooms and squash; in winter rely on steamed broccoli and frozen mixed vegetables. For holiday gatherings double the recipe and serve family-style with a variety of sides. Swap brown sugar for maple syrup in fall for a richer, slightly floral sweetness.
Meal Prep Tips
Cook a double batch of beef and portion into four containers with measured rice and separate steamed vegetables for grab-and-go lunches. Use microwave-safe containers with vented lids, or invest in glass meal prep containers for oven-safe reheating. Label containers with the date and use within three days. For faster assembly during the week, pre-slice green onions and toast sesame seeds ahead of time; when reheating, add a splash of water to the beef to restore sauce consistency.
These Korean-style bowls are comfort food with a bright, modern edge. They’re easy to adapt, quick to prepare, and delicious enough to become part of your regular dinner rotation. Give the sauce a try the next time you need an effortless, flavorful weeknight meal — and don’t be surprised when guests ask for the recipe.
Pro Tips
Toast sesame seeds in a dry skillet for 1–2 minutes to awaken their flavor before garnishing.
Make the cornstarch slurry with cold water and add it slowly while stirring to avoid lumps and to control thickness.
If the sauce reduces too much, add 1–2 tablespoons of water or beef broth to reach the desired consistency.
Cook rice ahead and keep it slightly underdone so it reheats without becoming gummy.
This nourishing korean beef bowls recipe is sure to be a staple in your kitchen. Enjoy every moist, high protein slice — it is perfect for breakfast or as a wholesome snack any time.
FAQs about Recipes
Can I make this gluten-free?
Yes — you can swap tamari for soy sauce to make it gluten-free. Use a gluten-free sweetener or reduce brown sugar slightly if needed.
How long will leftovers keep?
Refrigerate in an airtight container for up to 3 days. Freeze cooled portions for up to 3 months and thaw overnight before reheating.
Can I make a vegetarian version?
Yes. Use crumbled firm tofu or cooked lentils and increase sesame oil and soy sauce slightly to boost savory flavor.
Tags
Korean Beef Bowls
This Korean Beef Bowls recipe makes perfectly juicy, tender, and flavorful steak every time! Serve with potatoes and a side salad for an unforgettable dinner in under 30 minutes.
Ingredients
Beef mixture
Garnish & Serve
Instructions
Cook the ground beef
Heat a large skillet over medium-high heat. Add the ground beef and break up with a spatula. Cook for 4–6 minutes until no longer pink and starting to brown. Drain excess fat if necessary.
Add garlic and ginger
Reduce heat slightly and stir in the minced garlic and ginger. Cook for 1 minute until fragrant, avoiding over-browning.
Mix and add the sauce
Whisk together sesame oil, brown sugar and low-sodium soy sauce in a small bowl. Pour over the beef and bring to a simmer; cook 3–4 minutes to meld flavors.
Thicken the sauce
Whisk 1 teaspoon cornstarch with 1 tablespoon cold water and stir into the beef. Cook for 1 minute until the sauce thickens and becomes glossy. Adjust thickness with water if needed.
Finish and serve
Remove from heat, stir in sliced green onions and toasted sesame seeds. Divide rice and vegetables among bowls, spoon beef over, garnish and serve immediately.
Last Step: Please leave a rating and comment letting us know how you liked this recipe! This helps our business to thrive and continue providing free, high-quality recipes for you.
Nutrition
Did You Make This?
Leave a comment & rating below or tag
@kitchenfunwithmy3sons on social media!
Categories:
You might also like...

10 Minute Immune Boosting Broth
A fast, nourishing broth packed with garlic, ginger, miso, and turmeric to support immunity. Ready in 10 minutes and naturally dairy free, gluten free, and vegan.

20-Minute Greek Pasta Salad
A bright, quick Greek-style pasta salad loaded with crunchy vegetables, Kalamata olives, tangy feta, and a creamy tzatziki dressing—ready in 20 minutes and perfect for summer gatherings.
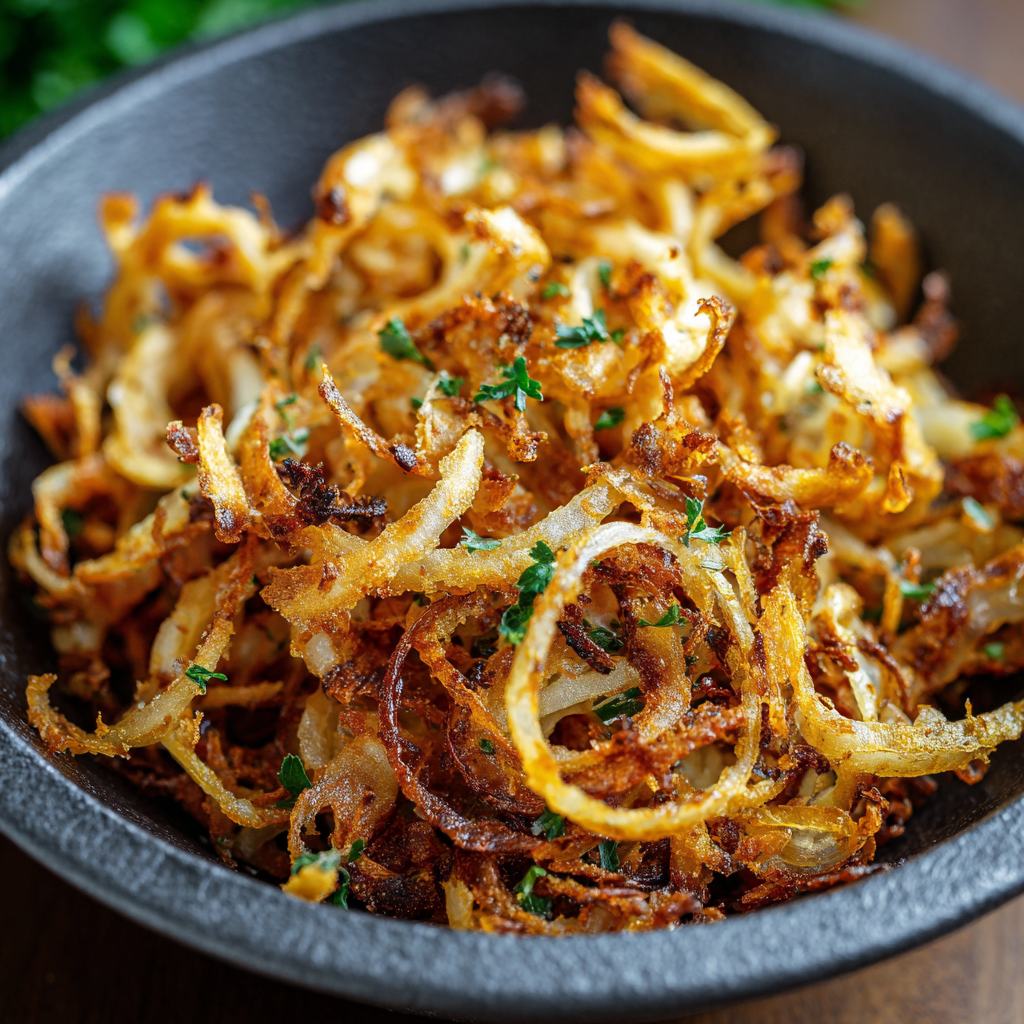
Air Fried Crispy Onion
Make perfectly caramelized crispy onions in an air fryer with just a touch of oil for a crunchy, savory topping that elevates any dish.
Did You Make This?
Leave a comment & rating below or tag @kitchenfunwithmysons on social media!
Rate This Recipe
Share This Recipe
Enjoyed this recipe? Share it with friends and family, and don't forget to leave a review!
Comments (1)
This recipe looks amazing! Can't wait to try it.
Comments are stored locally in your browser. Server comments are displayed alongside your local comments.
Hi, I'm Rachel!
What's Popular

Get My 30-Minute Meals email series!
Quick and easy dinner ideas delivered to your inbox.