>>
30-MINUTE MEALS! Get the email series now →


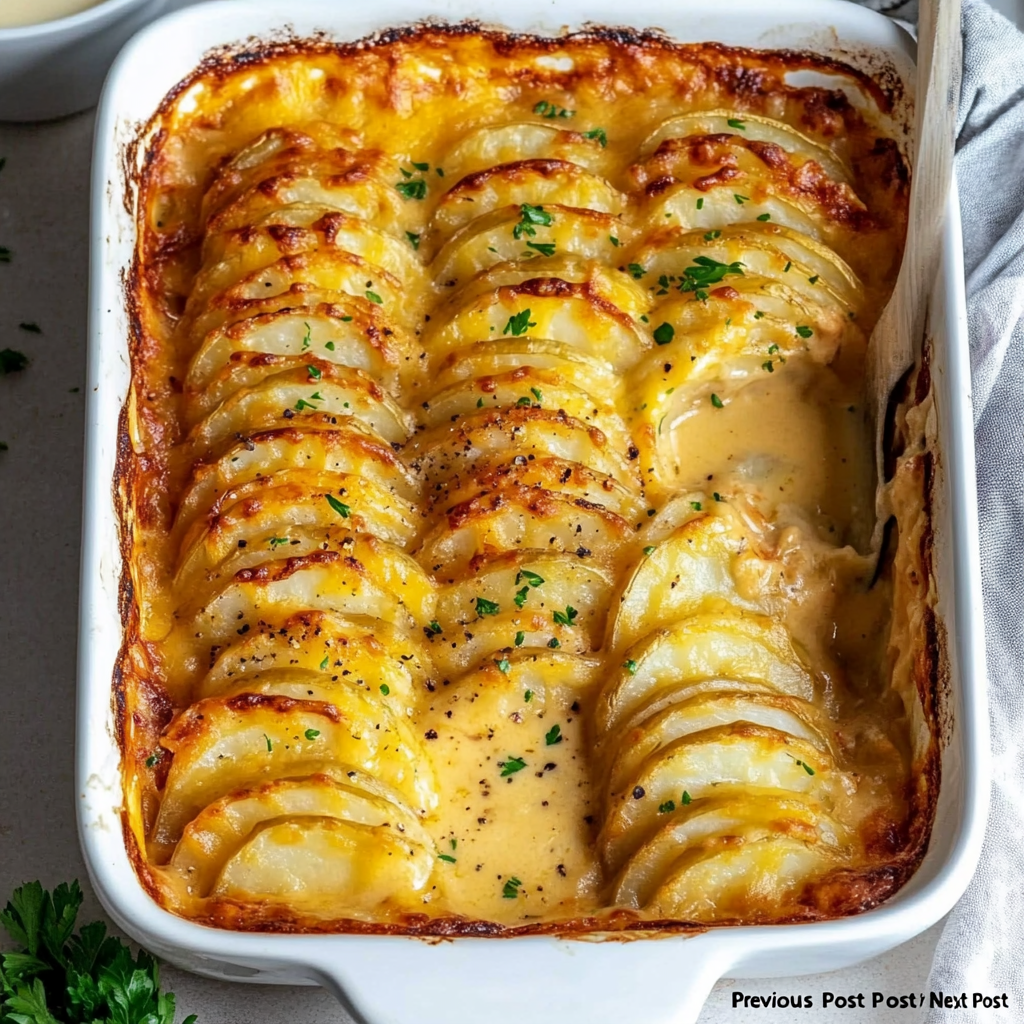
Crispy, cheesy squash slices baked to golden perfection with Parmesan, salt, and pepper — a quick, low-carb side that brightens any meal.
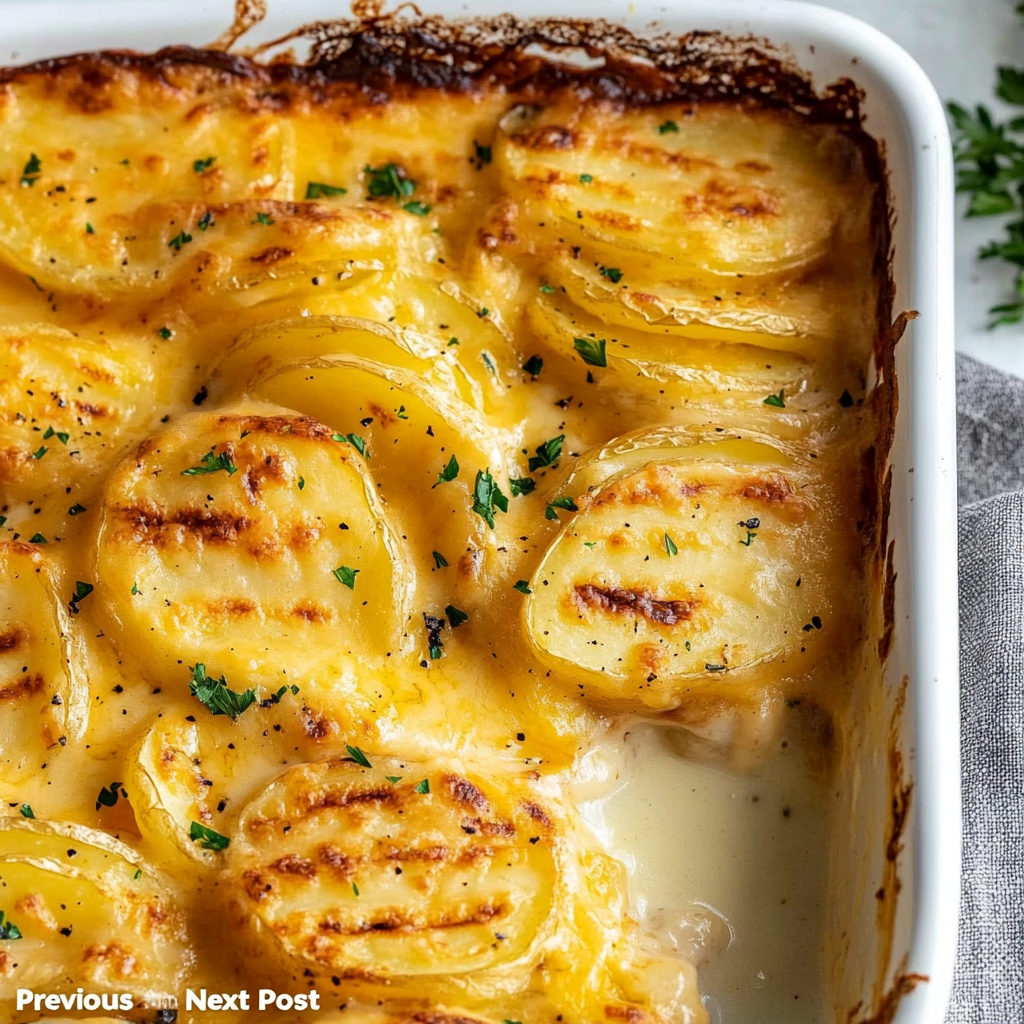
This simple tray of roasted Parmesan squash slices has been one of my quickest go-to side dishes for busy weeknights and impromptu dinners. I discovered this combination while looking for a way to make summer squash feel celebratory rather than ordinary: thin slices, a light sprinkle of salt and pepper, and just enough Parmesan to crisp into a golden lace that contrasts with the squash’s tender flesh. The first time I made it, my partner insisted we serve it with everything from a bowl of soup to a simple roast chicken, and it quickly became a requested accompaniment whenever zucchini or yellow squash were in season.
The appeal is immediate: a crisp, cheesy edge, a soft, slightly sweet center, and a bright savory finish from freshly cracked black pepper. Because the slices roast in a single layer, they develop tiny browned pockets of umami from the cheese while keeping the squash’s natural moisture. This combination makes the dish feel indulgent even though it’s light, low in carbohydrates, and naturally gluten-free. It’s the sort of side that looks like you labored over it but is genuinely effortless — perfect for sharing and comfortable enough for everyday meals.
I still remember the first time I served this to my in-laws; they asked for the recipe and then promptly served it alongside grilled fish and crisp lettuce. The cheese-to-squash ratio is forgiving — a little more or less won’t break the dish — and the visual appeal of golden, lacy edges always earns compliments. Over time I learned that uniform slicing and a hot oven are the two small details that make a big difference.
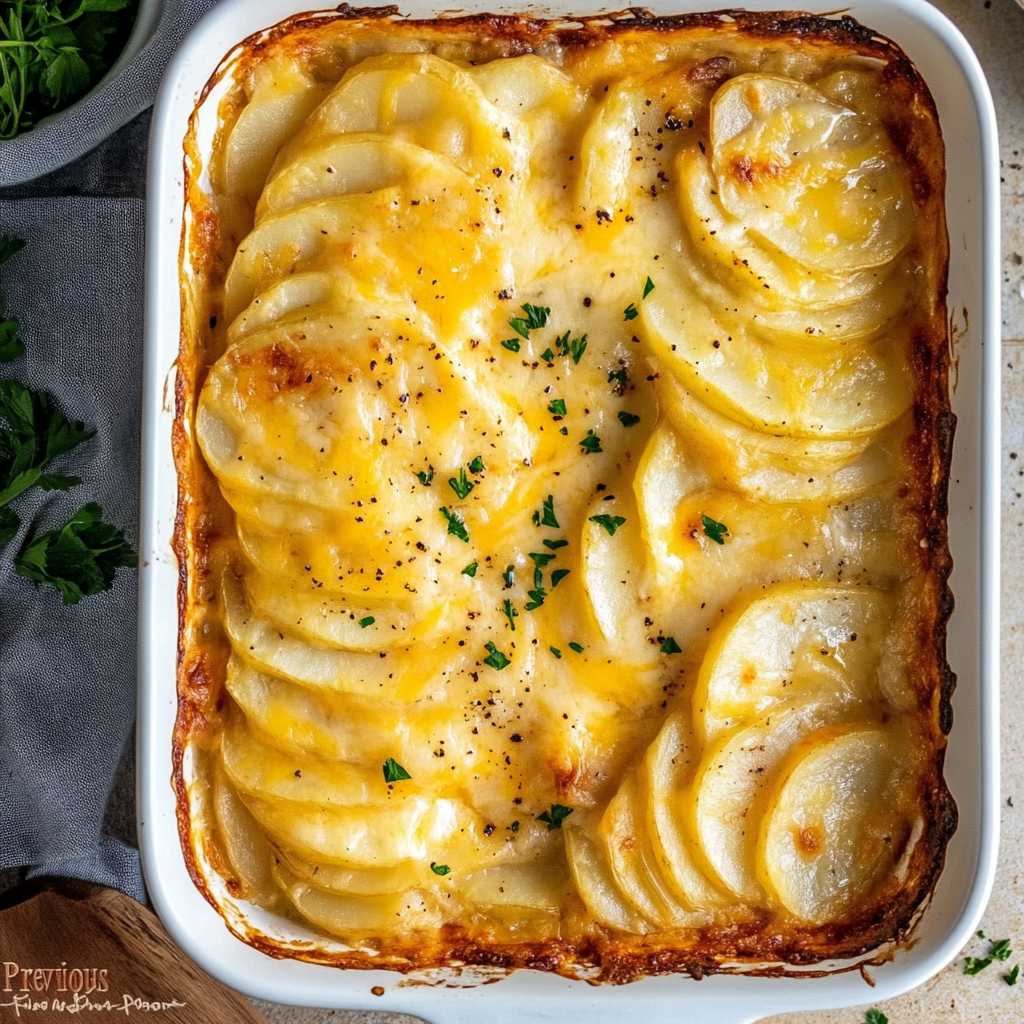
My favorite aspect is how the cheesy edges turn into golden, crisp little chips that contrast with the squash’s soft center. At family dinners, kids gravitate to those edges first. Once, I doubled the recipe for a summer potluck and was surprised how many guests asked for the recipe — it’s the sort of small dish that elevates a simple spread without demanding much time or technique.
Store cooled slices in an airtight container in the refrigerator for up to 3 days. To retain as much crispness as possible, layer pieces between sheets of parchment or paper towel to absorb excess moisture. Reheat in a single layer on a baking sheet at 400°F for 5–8 minutes or place under a hot broiler for 30–60 seconds; alternatively, a dry skillet over medium-high heat will refresh the edges. Avoid microwaving if you care about texture — it will make the cheese and squash soft rather than crisp.
If you don’t have Parmesan, Pecorino Romano makes a good substitute for a sharper, saltier finish; use a little less salt when using Pecorino. For a nut-free, dairy-free alternative, try a finely ground, shelf-stable plant-based Parmesan or nutritional yeast mixed with a touch of olive oil to help it brown — keep expectations in mind as the texture changes. If yellow squash is unavailable, zucchini works identically; adjust the cooking time by a minute or two because thicker zucchini slices can hold more moisture.
These slices pair beautifully with simply roasted meats, grilled fish, or as a crunchy component on a composed salad. For a casual meal, serve alongside crusty bread, mixed greens with a lemon vinaigrette, and roasted cherry tomatoes. Garnish with a scattering of chopped fresh herbs like parsley or chives for color and freshness. For an appetizer, pile them on a platter with a dollop of ricotta or labneh and a drizzle of extra-virgin olive oil.
Roasting thin vegetables with cheese is a technique that echoes Mediterranean and Southern European approaches to making the most of abundant summer produce. Hard, aged cheeses like Parmesan have long been used to add savory umami and texture to vegetables across Italy and its neighboring regions. The combination of a simple vegetable with aged cheese celebrates the ingredient’s natural sweetness and creates a satisfying contrast favored in many European kitchen traditions.
In late summer when squash is at its peak, use the freshest small-to-medium fruits for the tenderest flesh. In cooler months, swap in thinly sliced sweet potatoes or eggplant and increase oven temperature briefly to encourage browning. For a holiday twist, add a light dusting of smoked paprika or chopped toasted walnuts after roasting. A squeeze of lemon or a few shreds of lemon zest before serving brightens the dish for winter menus.
For easy weekday meals, roast multiple trays at once and cool completely before storing in shallow airtight containers. Portion into 4-serving containers for grab-and-go sides that reheat quickly. If you’re prepping for a dinner party, roast earlier in the day and re-crisp on a hot sheet just before guests arrive; the short reheat keeps the texture at its best without additional fuss. Keep a small jar of freshly grated Parmesan on hand to sprinkle over reheated pieces just before serving.
Small, unfussy, and reliable, these roasted Parmesan squash slices are one of those dishes that make weekday dinners feel special. I hope you try them and discover your own little ways to adapt and present them — they really do become a favorite with very little effort.
Slice the squash uniformly (about 1/8 inch) so all pieces roast at the same rate.
Use freshly grated Parmesan for the crispiest, most flavorful crust.
Preheat the oven fully to 425°F so the cheese browns before the squash overcooks.
Watch the final minute closely if you broil to avoid burning the cheese.
This nourishing roasted parmesan squash slices recipe is sure to be a staple in your kitchen. Enjoy every moist, high protein slice — it is perfect for breakfast or as a wholesome snack any time.
Use a mandoline or a sharp knife to slice uniformly about 1/8 inch thick for even roasting.
Store in an airtight container in the fridge up to 3 days; re-crisp under broiler or in a hot oven before serving.
This Roasted Parmesan Squash Slices recipe makes perfectly juicy, tender, and flavorful steak every time! Serve with potatoes and a side salad for an unforgettable dinner in under 30 minutes.
Preheat the oven to 425°F. Ensuring the oven is fully heated helps the cheese brown quickly and creates a crisp edge while the squash softens.
Line a rimmed baking tray with parchment paper to prevent sticking and to catch any melted cheese. A rimmed sheet helps if cheese crisps and flakes off.
Slice each squash into 1/8-inch rounds using a sharp knife or mandoline. Uniform slices roast evenly and achieve the best texture contrast between crispy edges and tender centers.
Arrange slices in a single layer and sprinkle a light pinch of kosher salt and freshly cracked black pepper. Be conservative with salt if using a very salty Parmesan.
Distribute the grated Parmesan evenly so each slice has a fine dusting. The thin layer of cheese melts and browns into a lacy crust rather than forming a heavy coating.
Bake for 12–15 minutes at 425°F until the squash is tender and the cheese forms golden, crisp edges. Optionally broil for the last 30–60 seconds for extra crispness — watch closely to prevent burning.
Remove and serve warm as a savory side. Reheat leftovers in a hot oven or under the broiler to refresh the crisp texture.
Last Step: Please leave a rating and comment letting us know how you liked this recipe! This helps our business to thrive and continue providing free, high-quality recipes for you.
Leave a comment & rating below or tag
@kitchenfunwithmy3sons on social media!
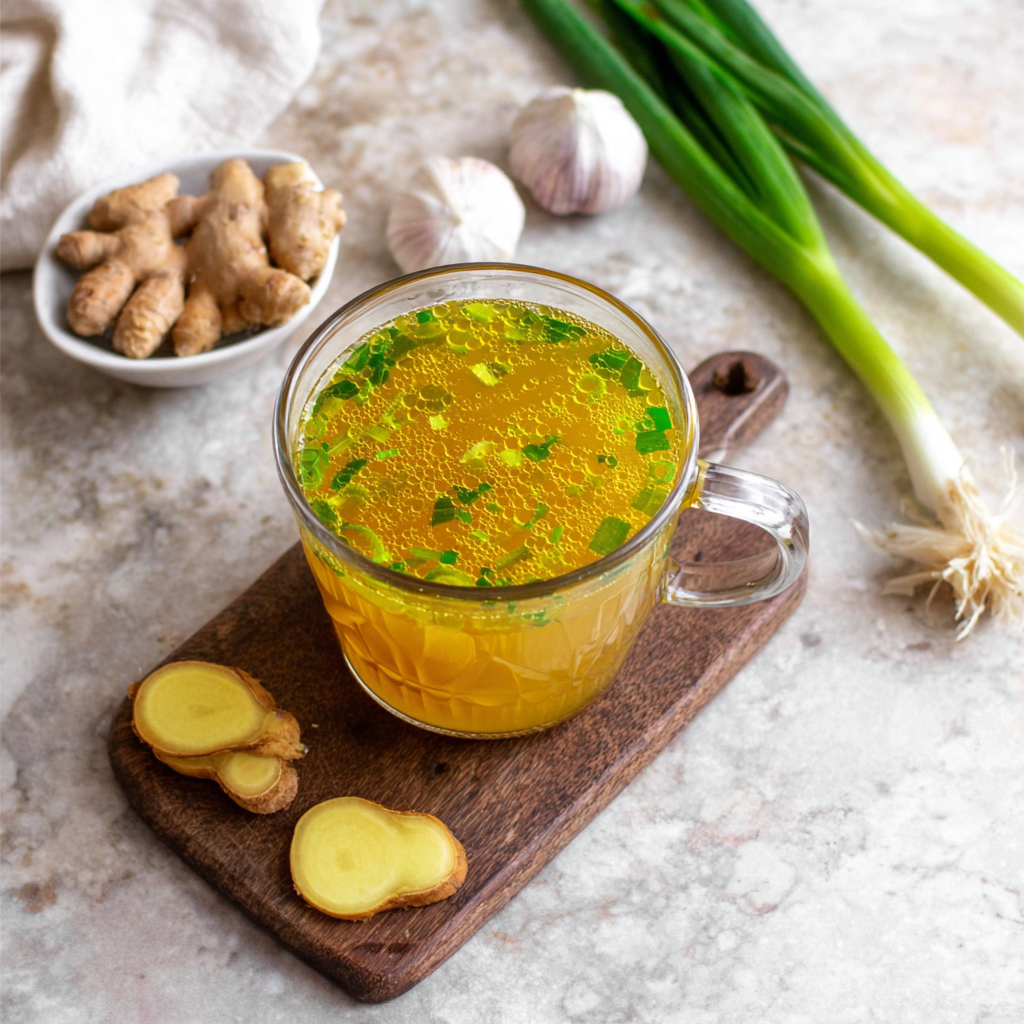
A fast, nourishing broth packed with garlic, ginger, miso, and turmeric to support immunity. Ready in 10 minutes and naturally dairy free, gluten free, and vegan.
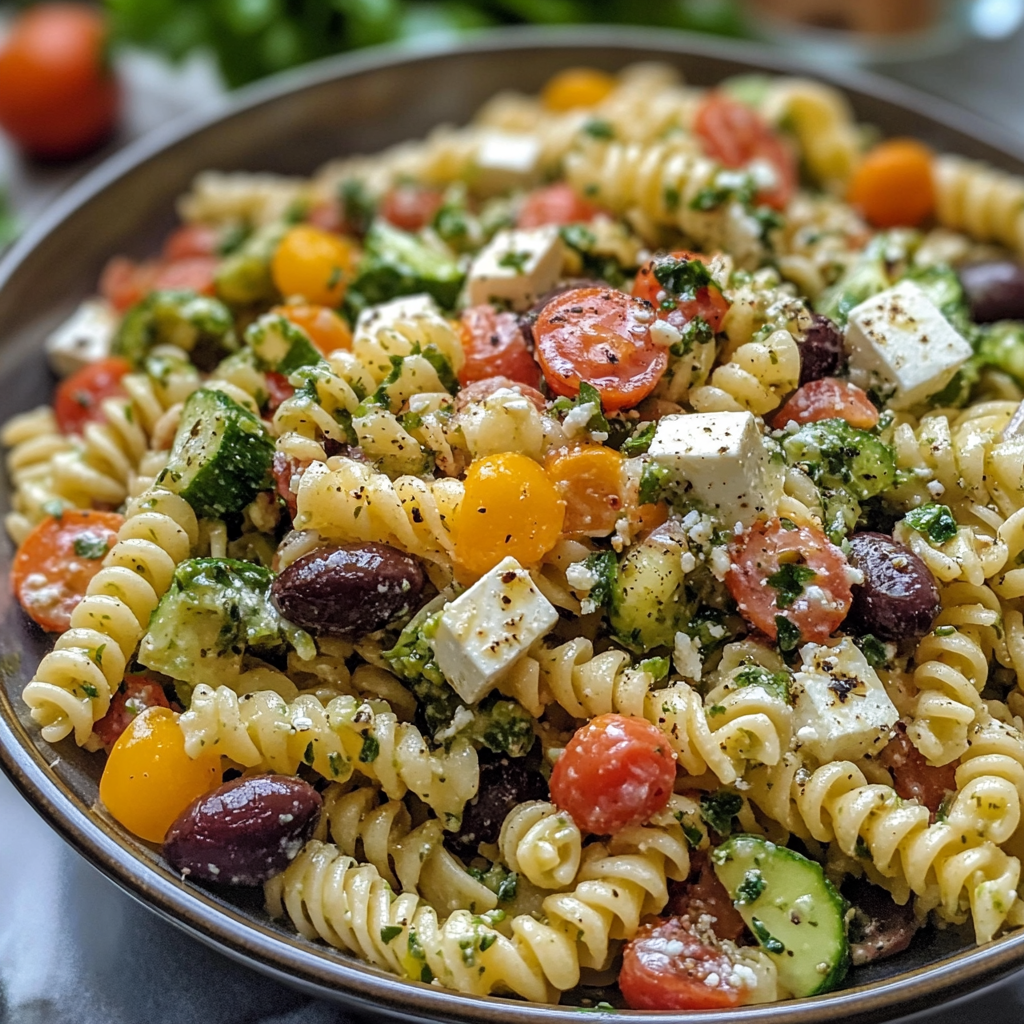
A bright, quick Greek-style pasta salad loaded with crunchy vegetables, Kalamata olives, tangy feta, and a creamy tzatziki dressing—ready in 20 minutes and perfect for summer gatherings.
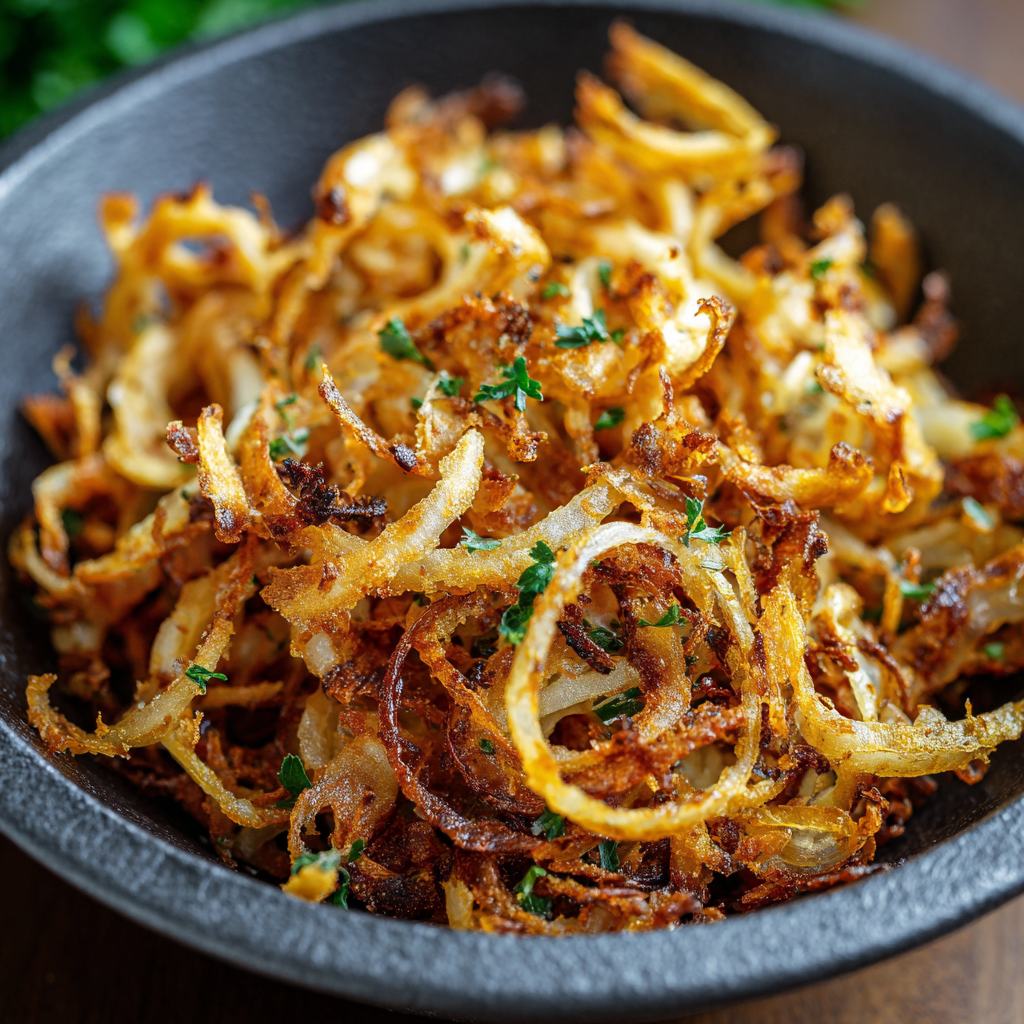
Make perfectly caramelized crispy onions in an air fryer with just a touch of oil for a crunchy, savory topping that elevates any dish.
Leave a comment & rating below or tag @kitchenfunwithmysons on social media!
Enjoyed this recipe? Share it with friends and family, and don't forget to leave a review!
This recipe looks amazing! Can't wait to try it.
Comments are stored locally in your browser. Server comments are displayed alongside your local comments.
Quick and easy dinner ideas delivered to your inbox.